Using OpenVPN and pfSense to circumvent ISP throttling
22 Oct 2017Sometimes you end up moving to a place where the only ISP options available are complete and total trash cough-CenturyLink-cough, so here’s the workaround that proxies only the likely-to-be-throttled traffic while leaving all other traffic untouched (eg, ping times for games stay low, any external services you have NAT’d will still work correctly).
This project uses:
- pfSense firewall
- OpenVPN software
- DigitalOcean droplet
Set up the droplet
DigitalOcean has a very thorough guide on setting up OpenVPN, it should be plenty to get you started.
Set up pfSense
You’ll need to configure pfSense’s OpenVPN client to connect and route traffic over the OpenVPN droplet
Add the certificates
- Open pfSense’s
Cert. Managerpage under theSystemdrop-down - Create the CA
- Click the
Addbutton - Name the CA “OpenVPN” (or whatever you want to call it, I’m not here to tell you how to live your life)
- Set
Methodto “Import an existing Certificate Authority” (It should default to this) - Copy the content of the
ca.crtyou created from DigitalOcean’s guide Certificate Private KeyandSerial for next certificateshould both be left blank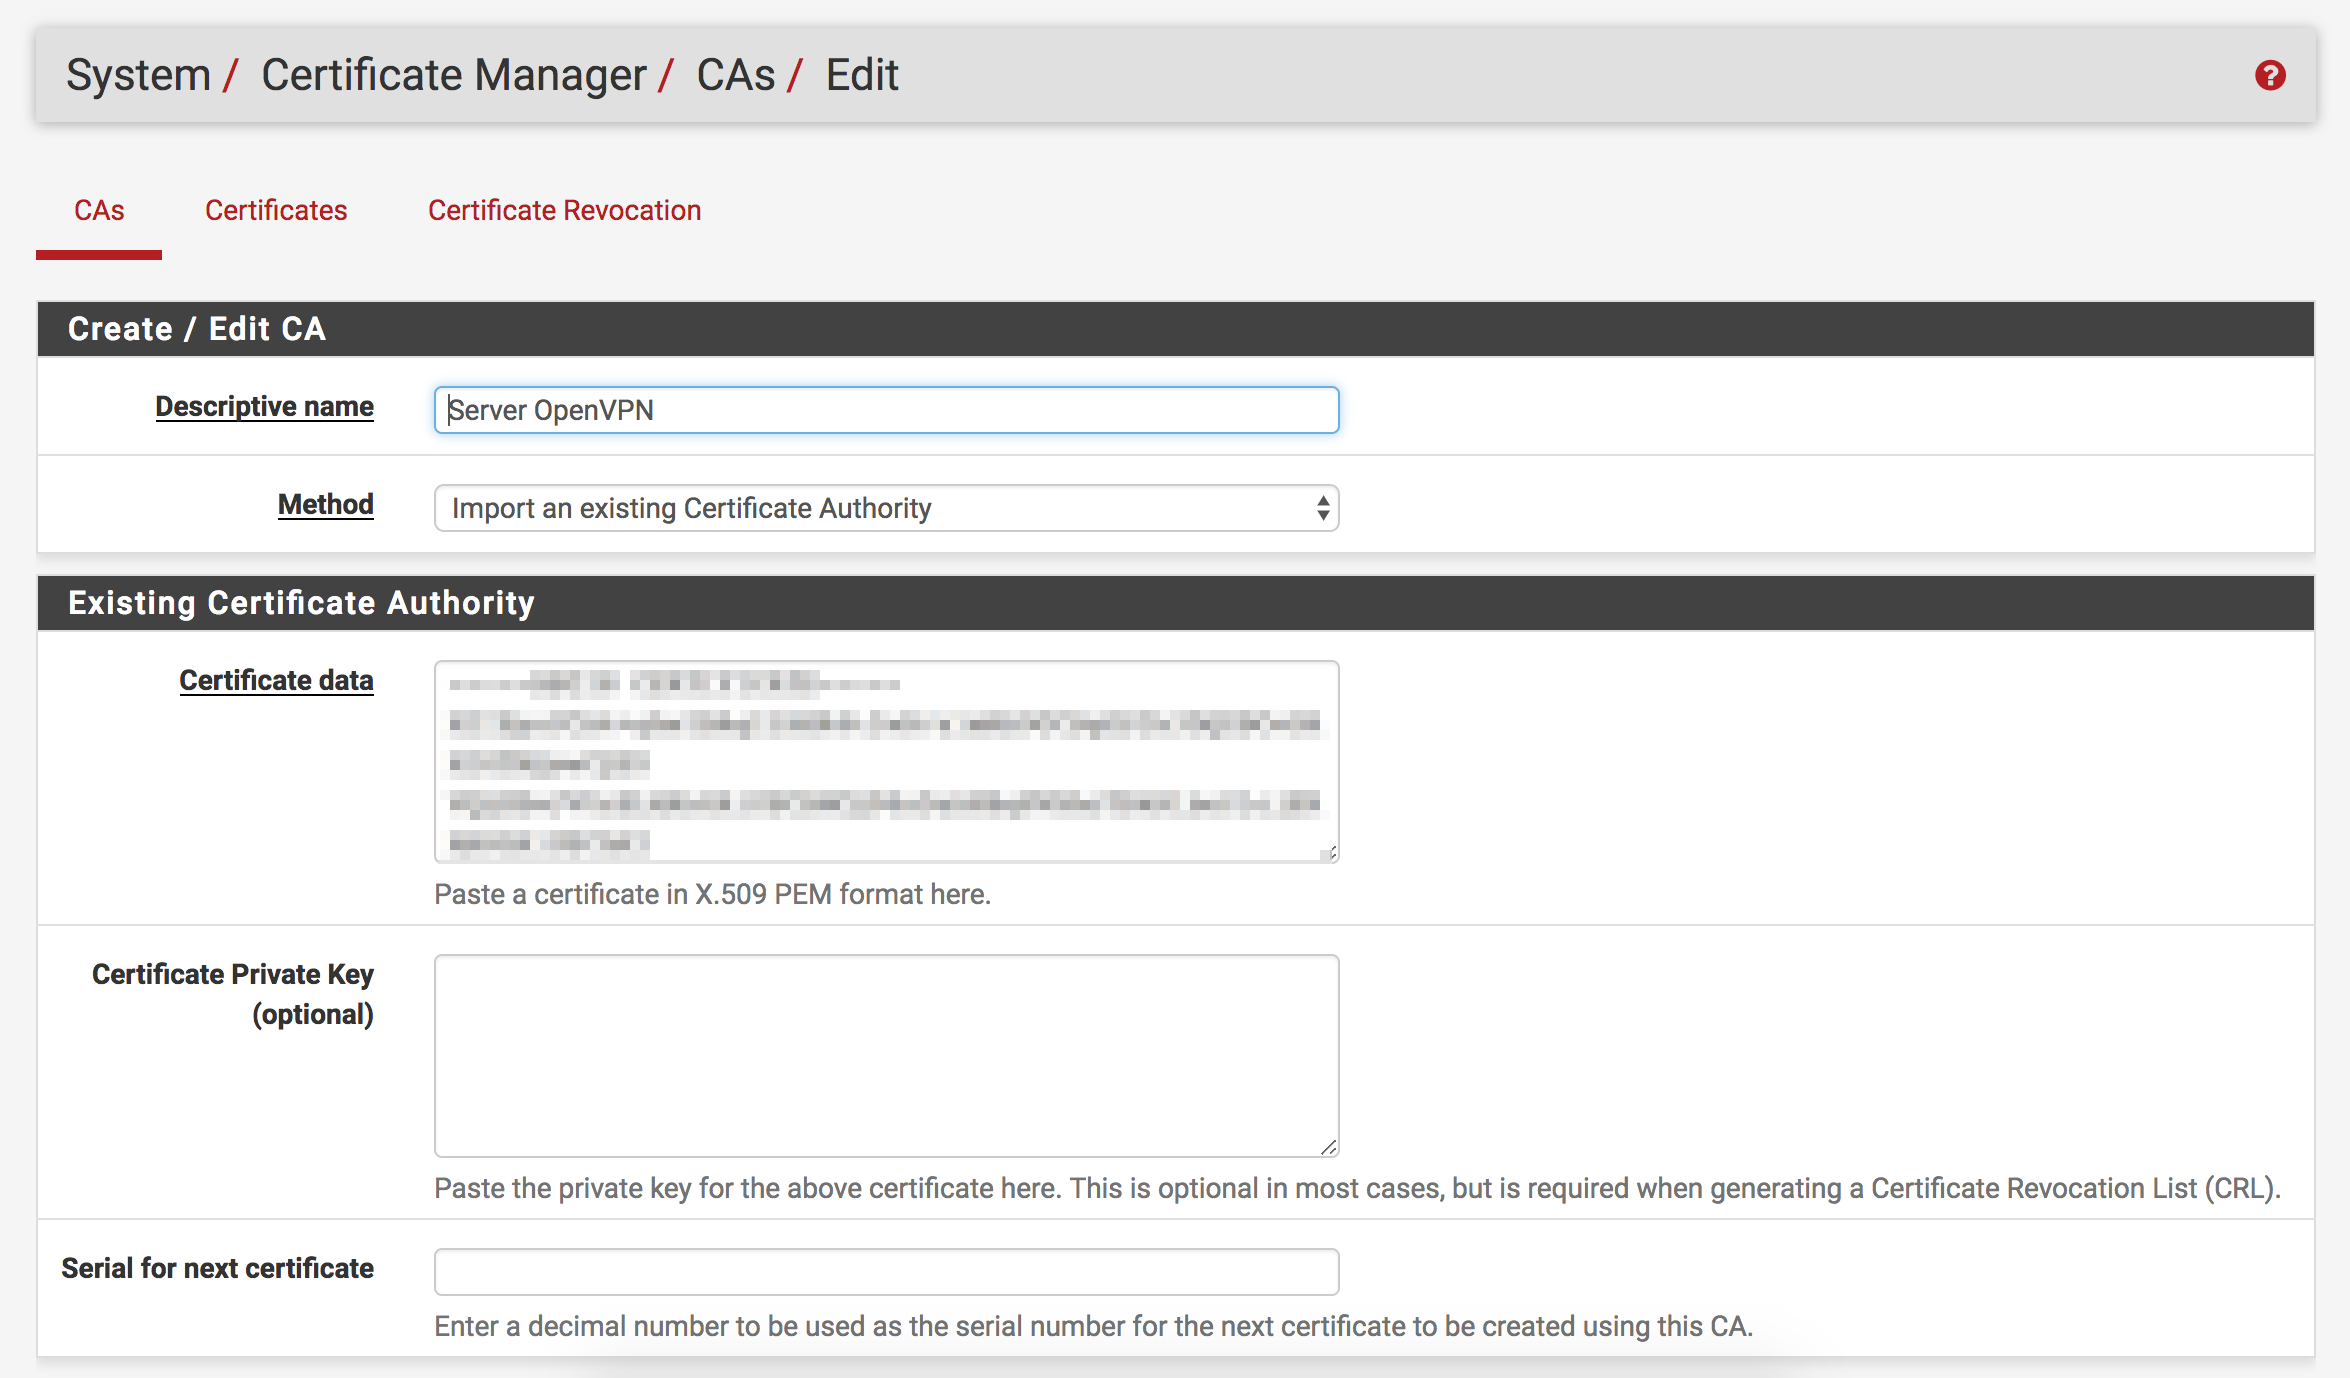
- Click the
- Add the OpenVPN client certificate and key
- Click the
Certificatesheader button at the top of the page after importing the CA - Click the
Addbutton - Leave
Methodas “Import an existing Certificate” - Name the certificate “OpenVPN” (Or don’t; it’s your party, you do what you want to)
- Paste the content of
client.crtcreated in DigitalOcean docs intoCertificate data - Paste the content of
client.keycreated in DigitalOcean docs inPrivate key data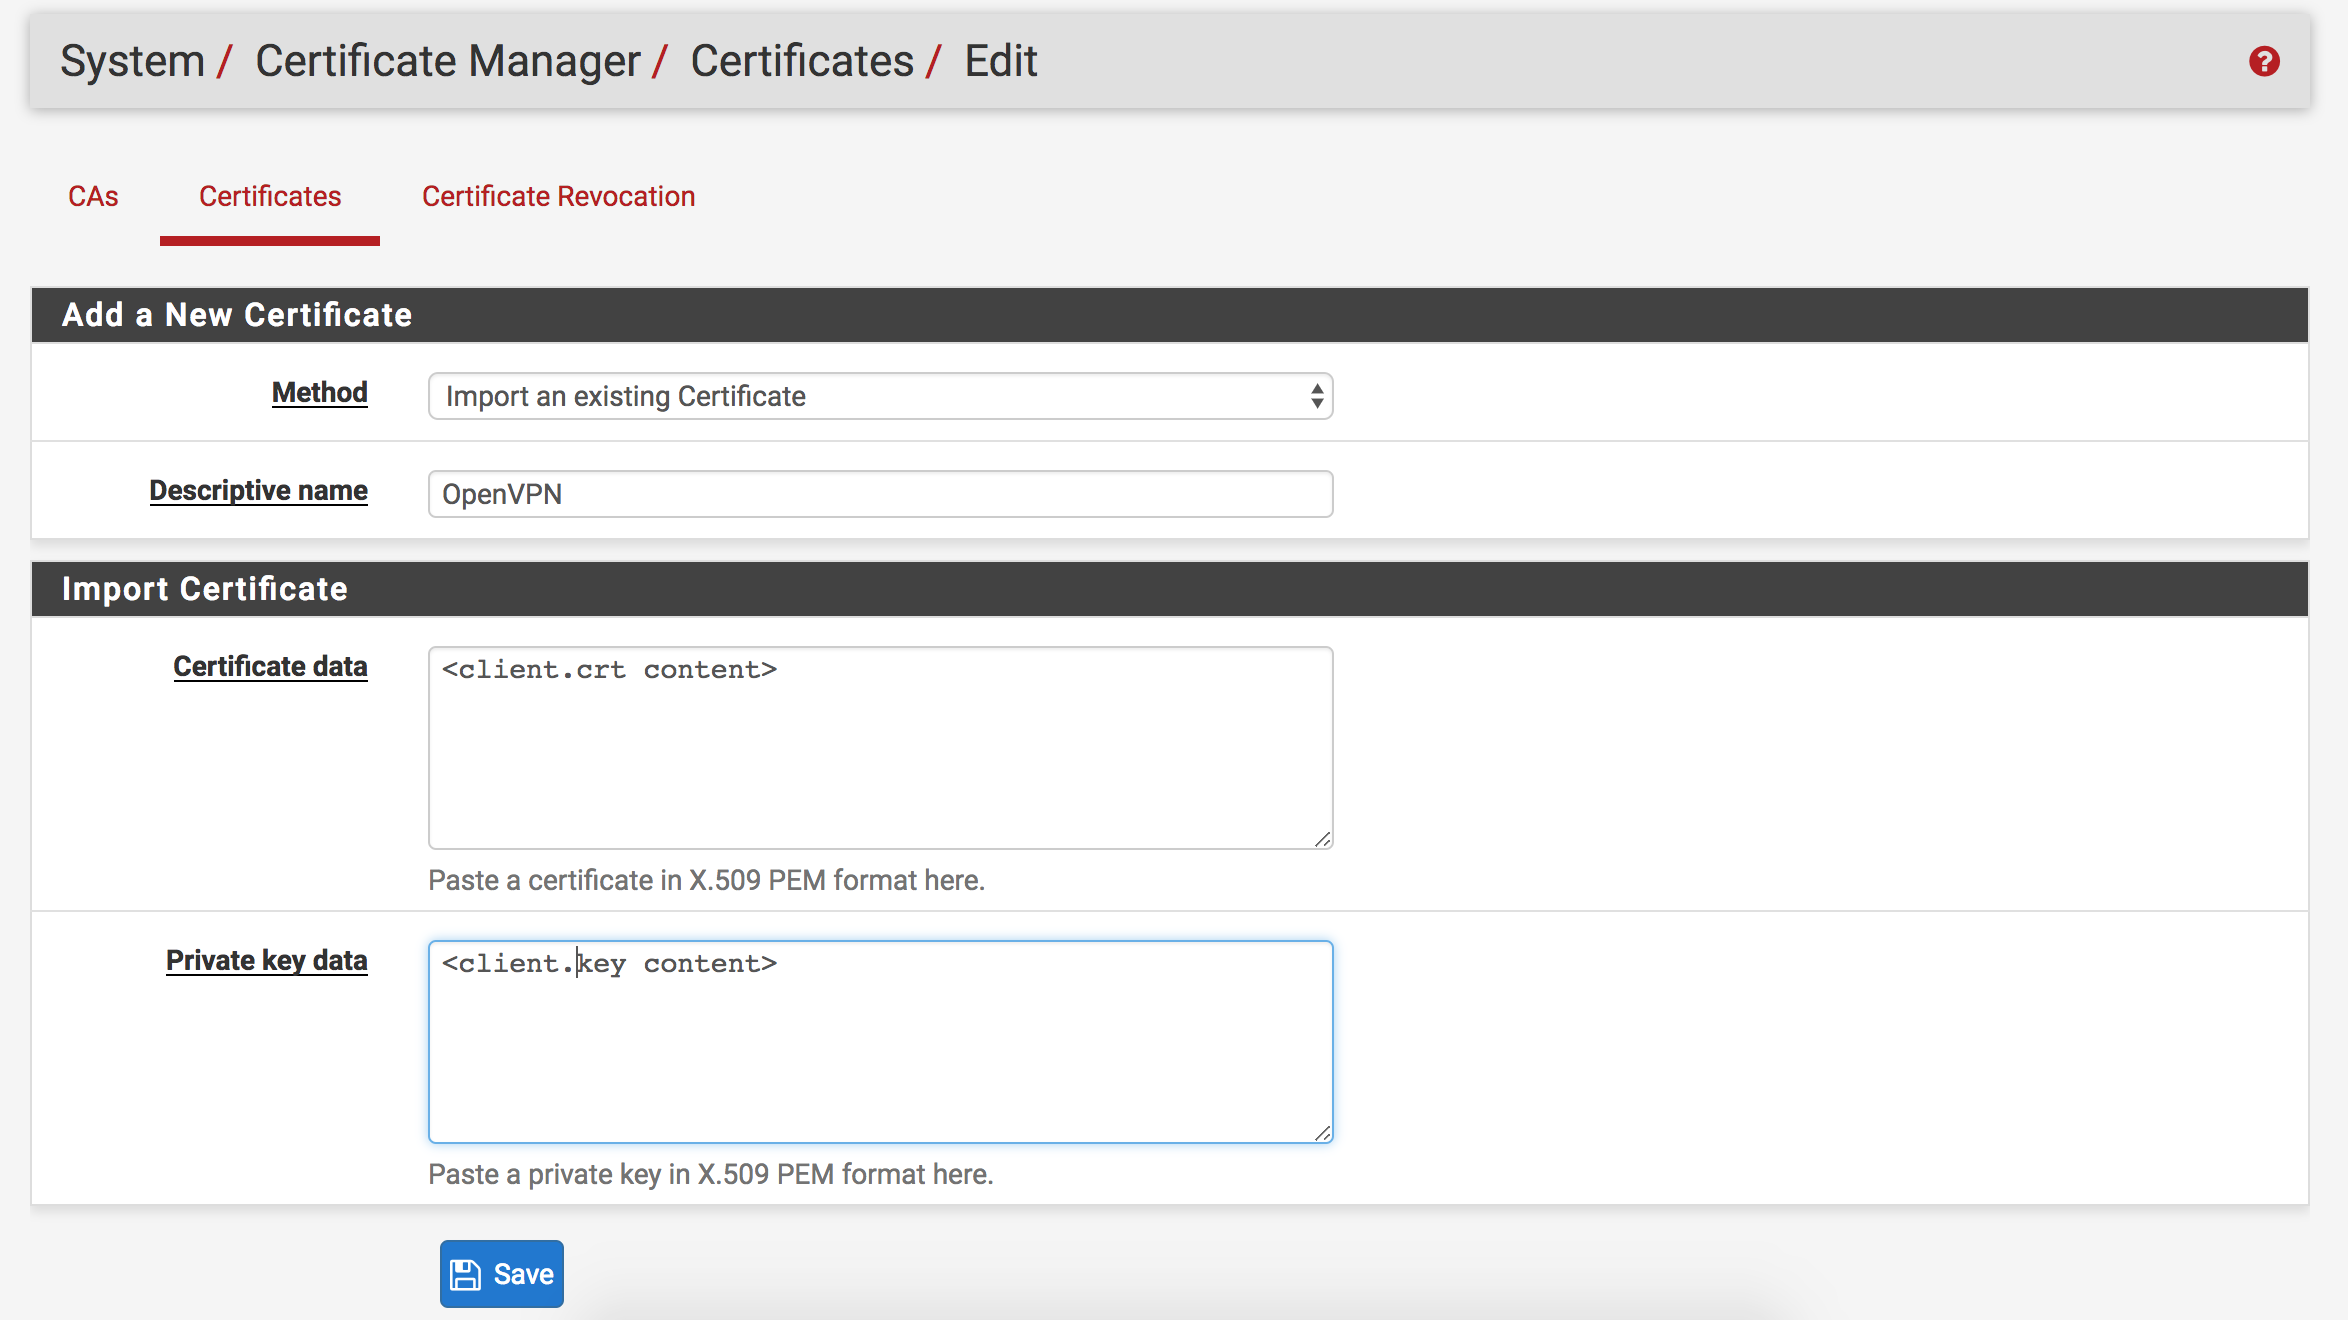
- Click the
Set up OpenVPN client
- Click
OpenVPNunder theVPNdropdown at the top of the page - Click the
Clientstab and clickAdd- Most settings can be left at defaults
- Put the IP of your Droplet in
Server host or address - Paste the content of
ta.keyinKeyfield after checkingTLS authentication - Change the
Peer Certificate AuthorityandClient Certificateto the CA and cert created earlier. - Change
Auth digest algorithmto “SHA256” - Under
Custom options, pastepersist-key;persist-tun;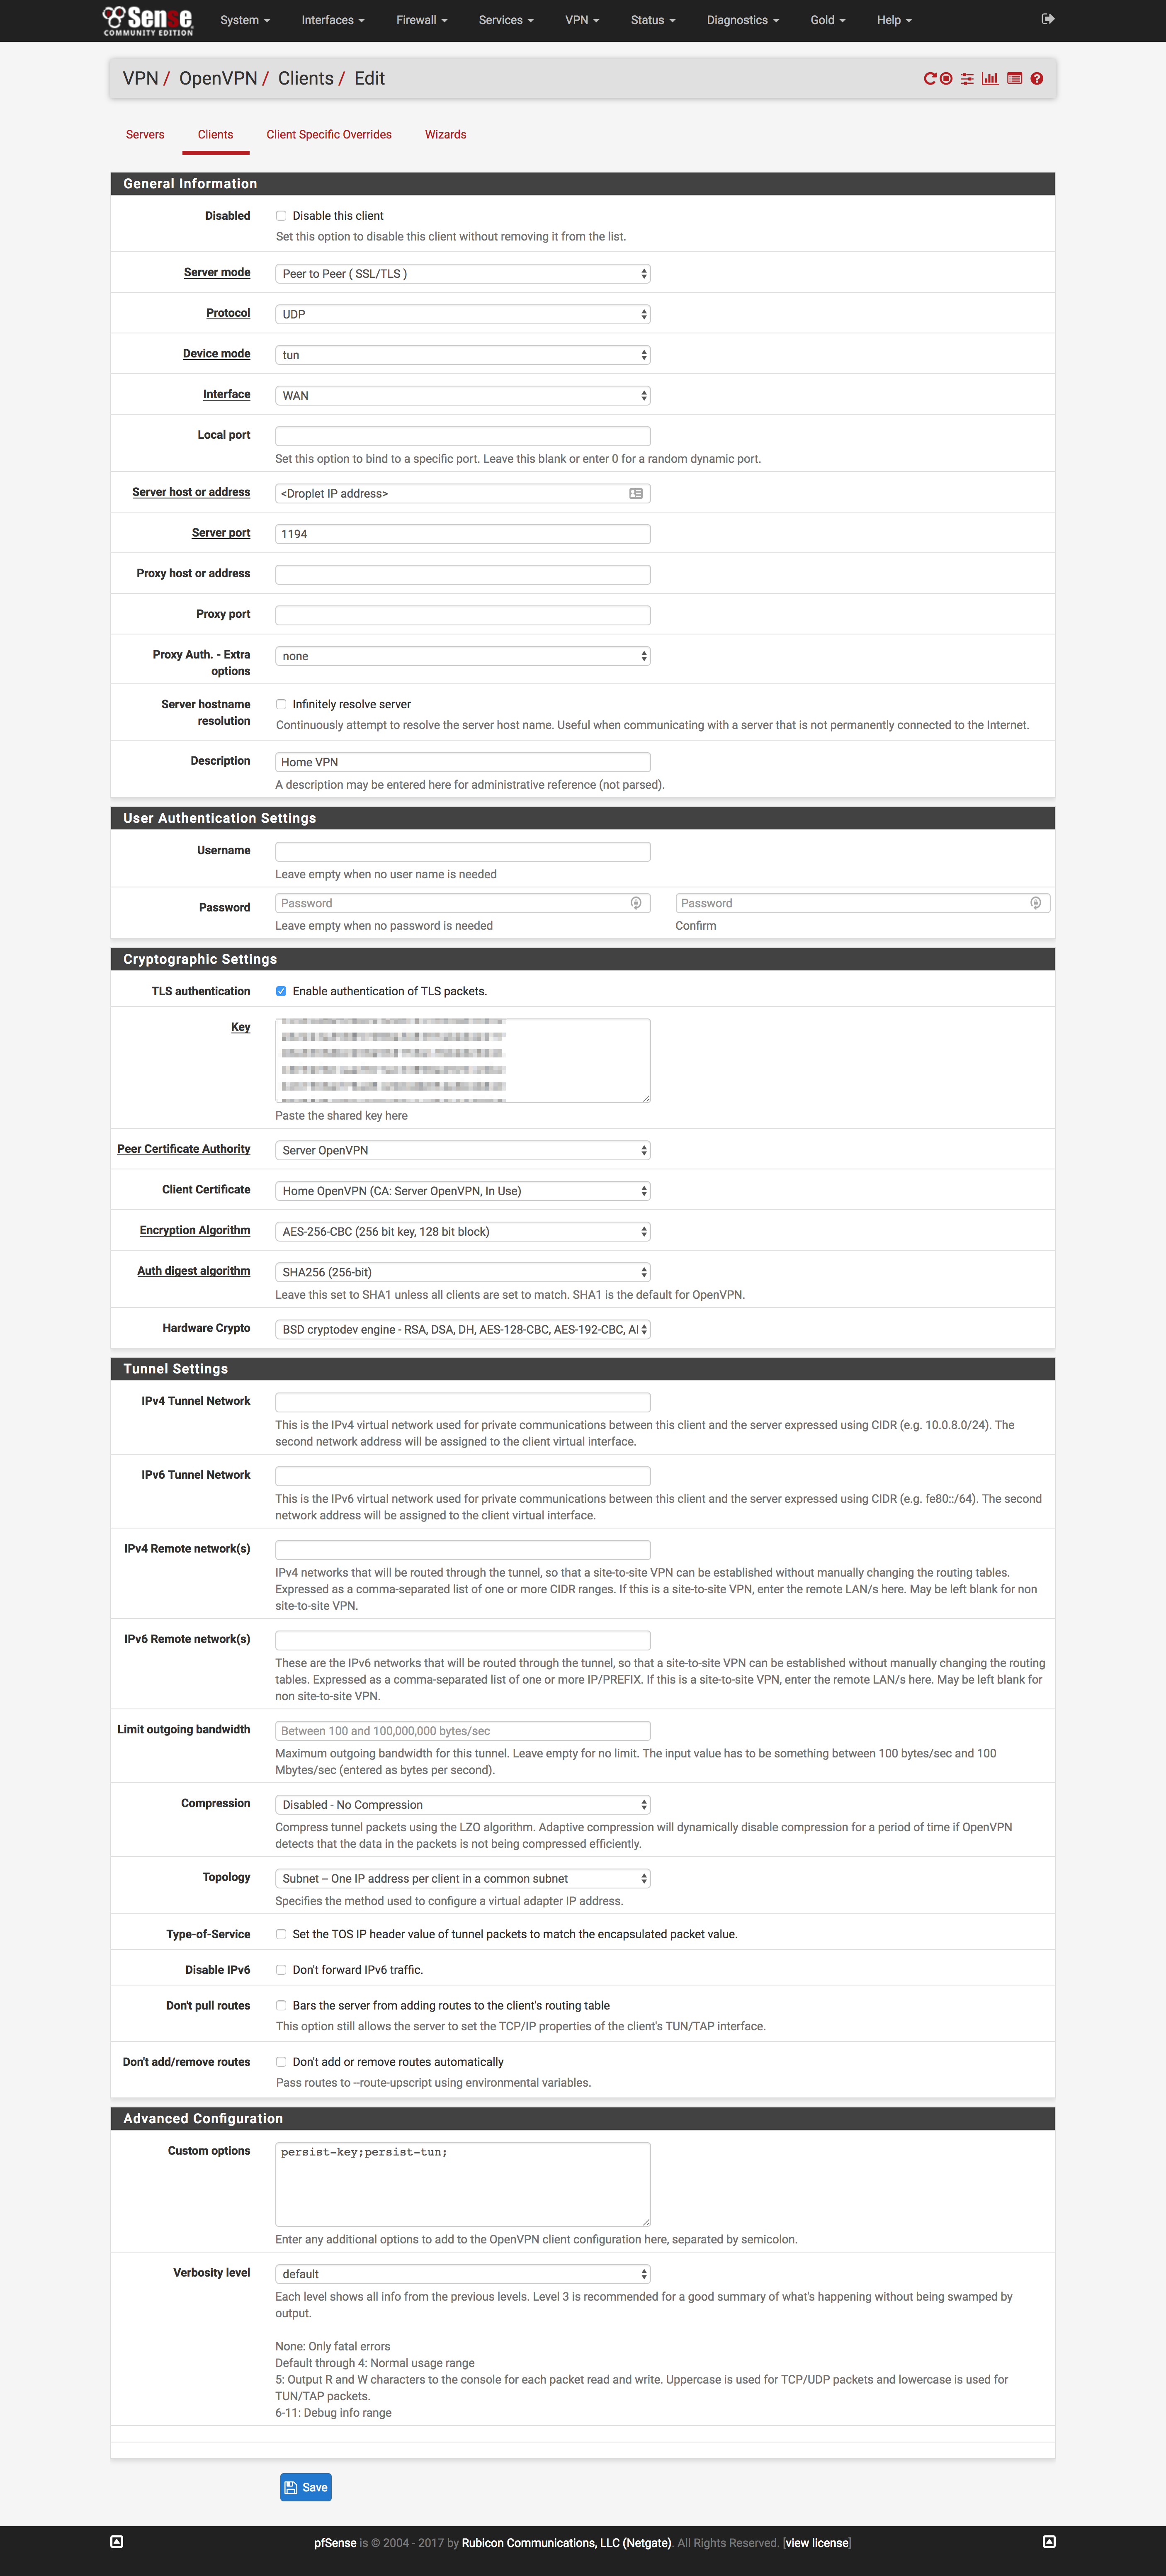
Start OpenVPN
- Click
OpenVPNunderneath theStatusbutton at the top of the page - Click the
Startbutton at the right of the page for the client created above
Create the OpenVPN interface
- Click
(assign)underneath theInterfacesdropdown at the top of the page - Change the dropdown near the bottom of the page to the OpenVPN client
created above and click
Add
Configure Gateway
- Click
Routingunder theSystemdropdown at the top of the page - Click
Addto create a new Gateway - Change
Interfaceto the interface created above - Check
Disable Gateway Monitoring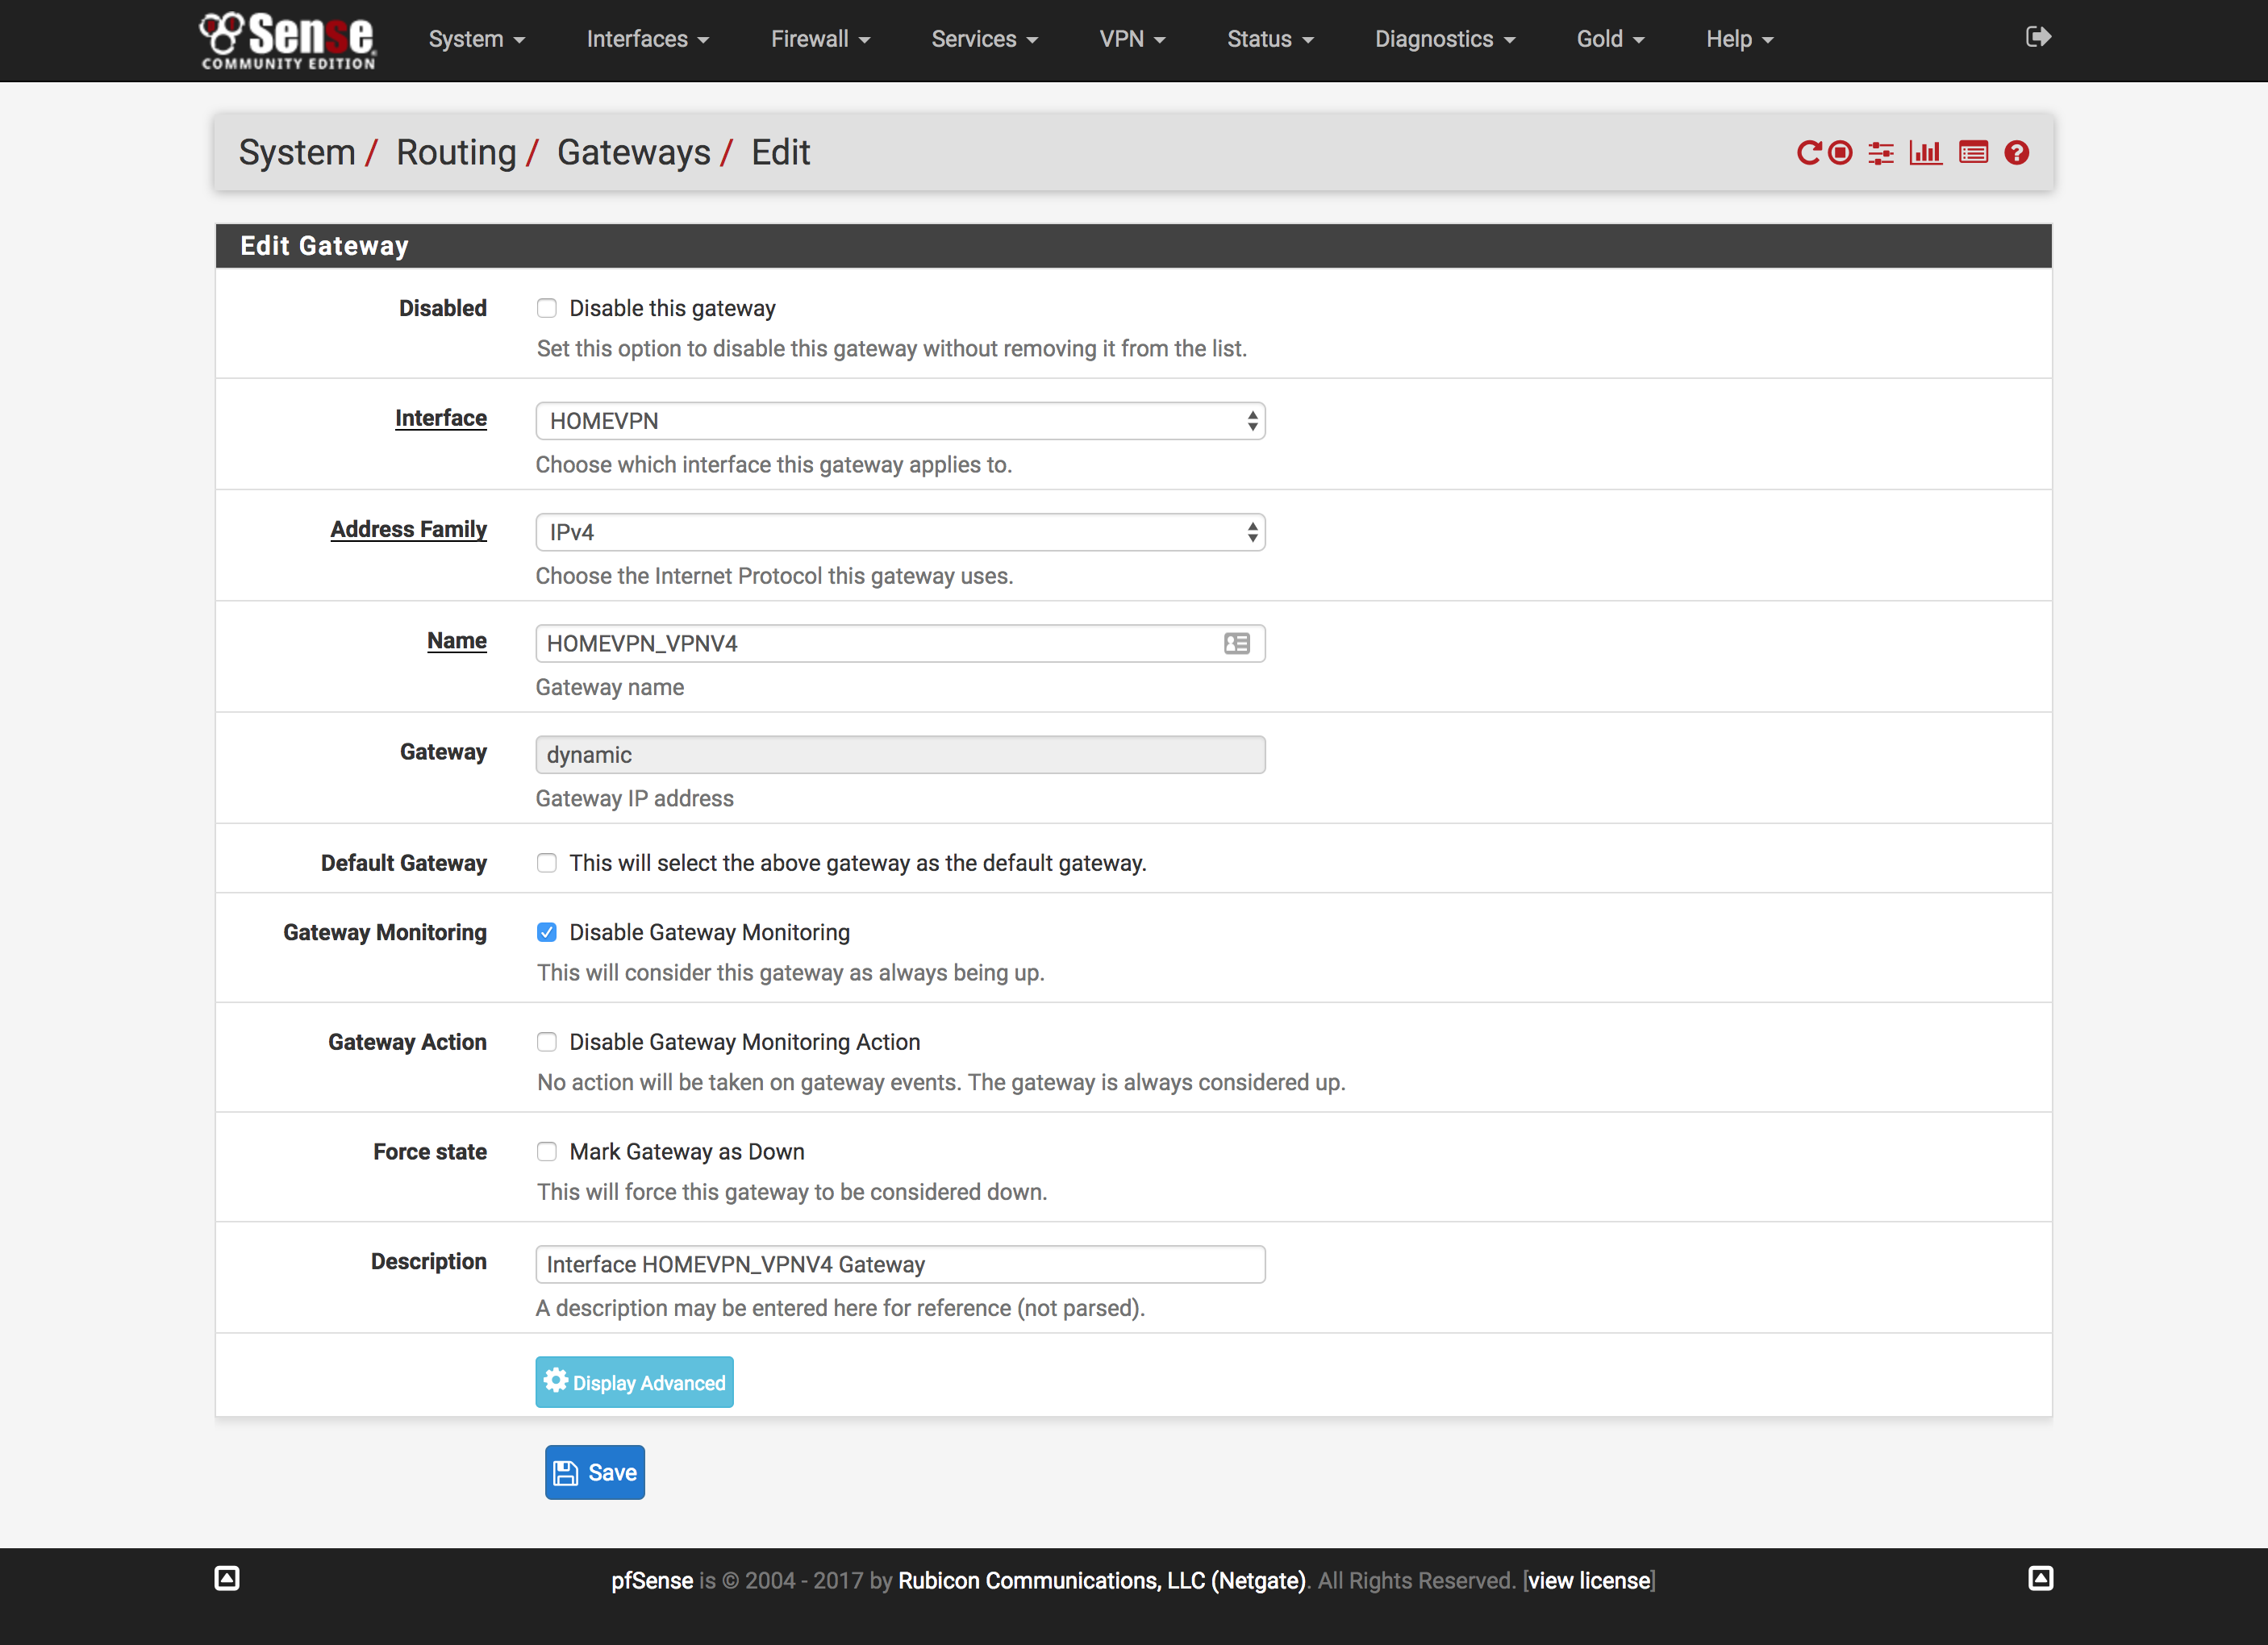
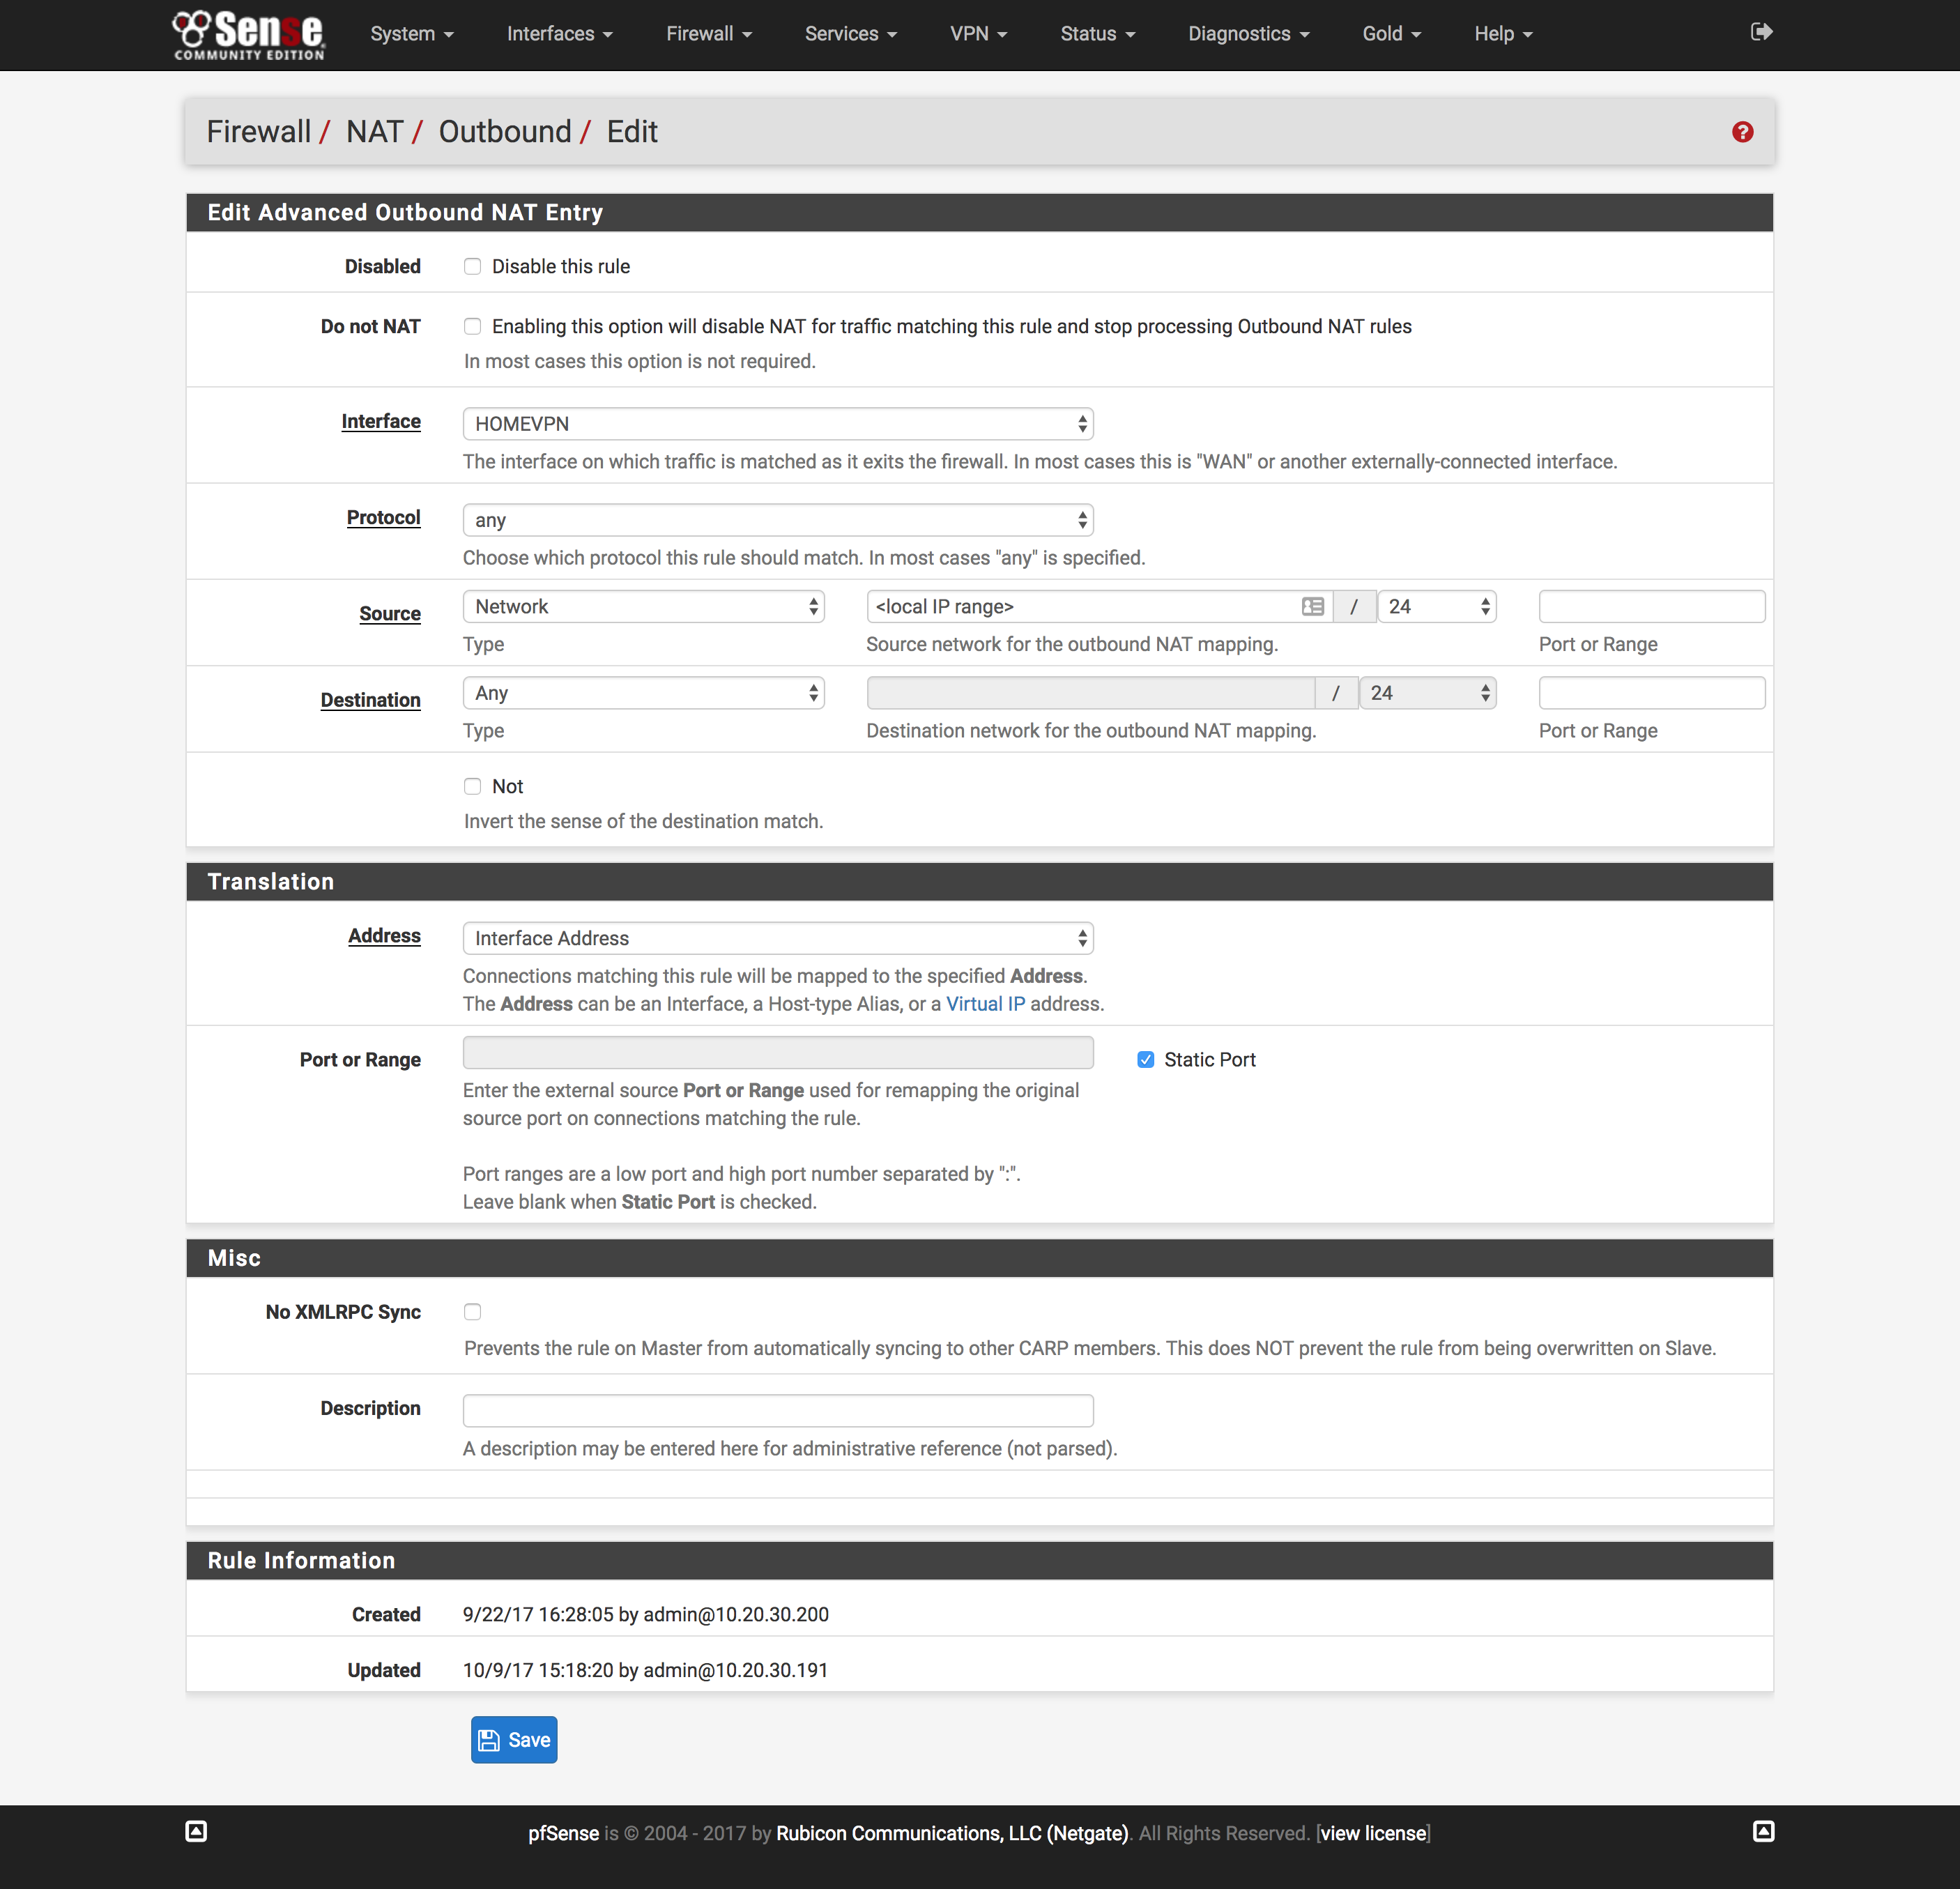
Configure NAT
- Click
NATunder theFirewalldropdown at the top of the page - Click the
Outboundtab and clickAdd - Change interface to the interface created above
Create firewall rules
- Click
Rulesunder theFirewalldropdown at the top of the page - Click the
LANtab and click theAddbutton with the upward-facing arrow - Change
ProtocoltoTCP/UDP - Change
Destination Port RangetoHTTPS - Click
Display AdvancedunderAdvanced Options - Change
Gatewayto the gateway created above and clickSave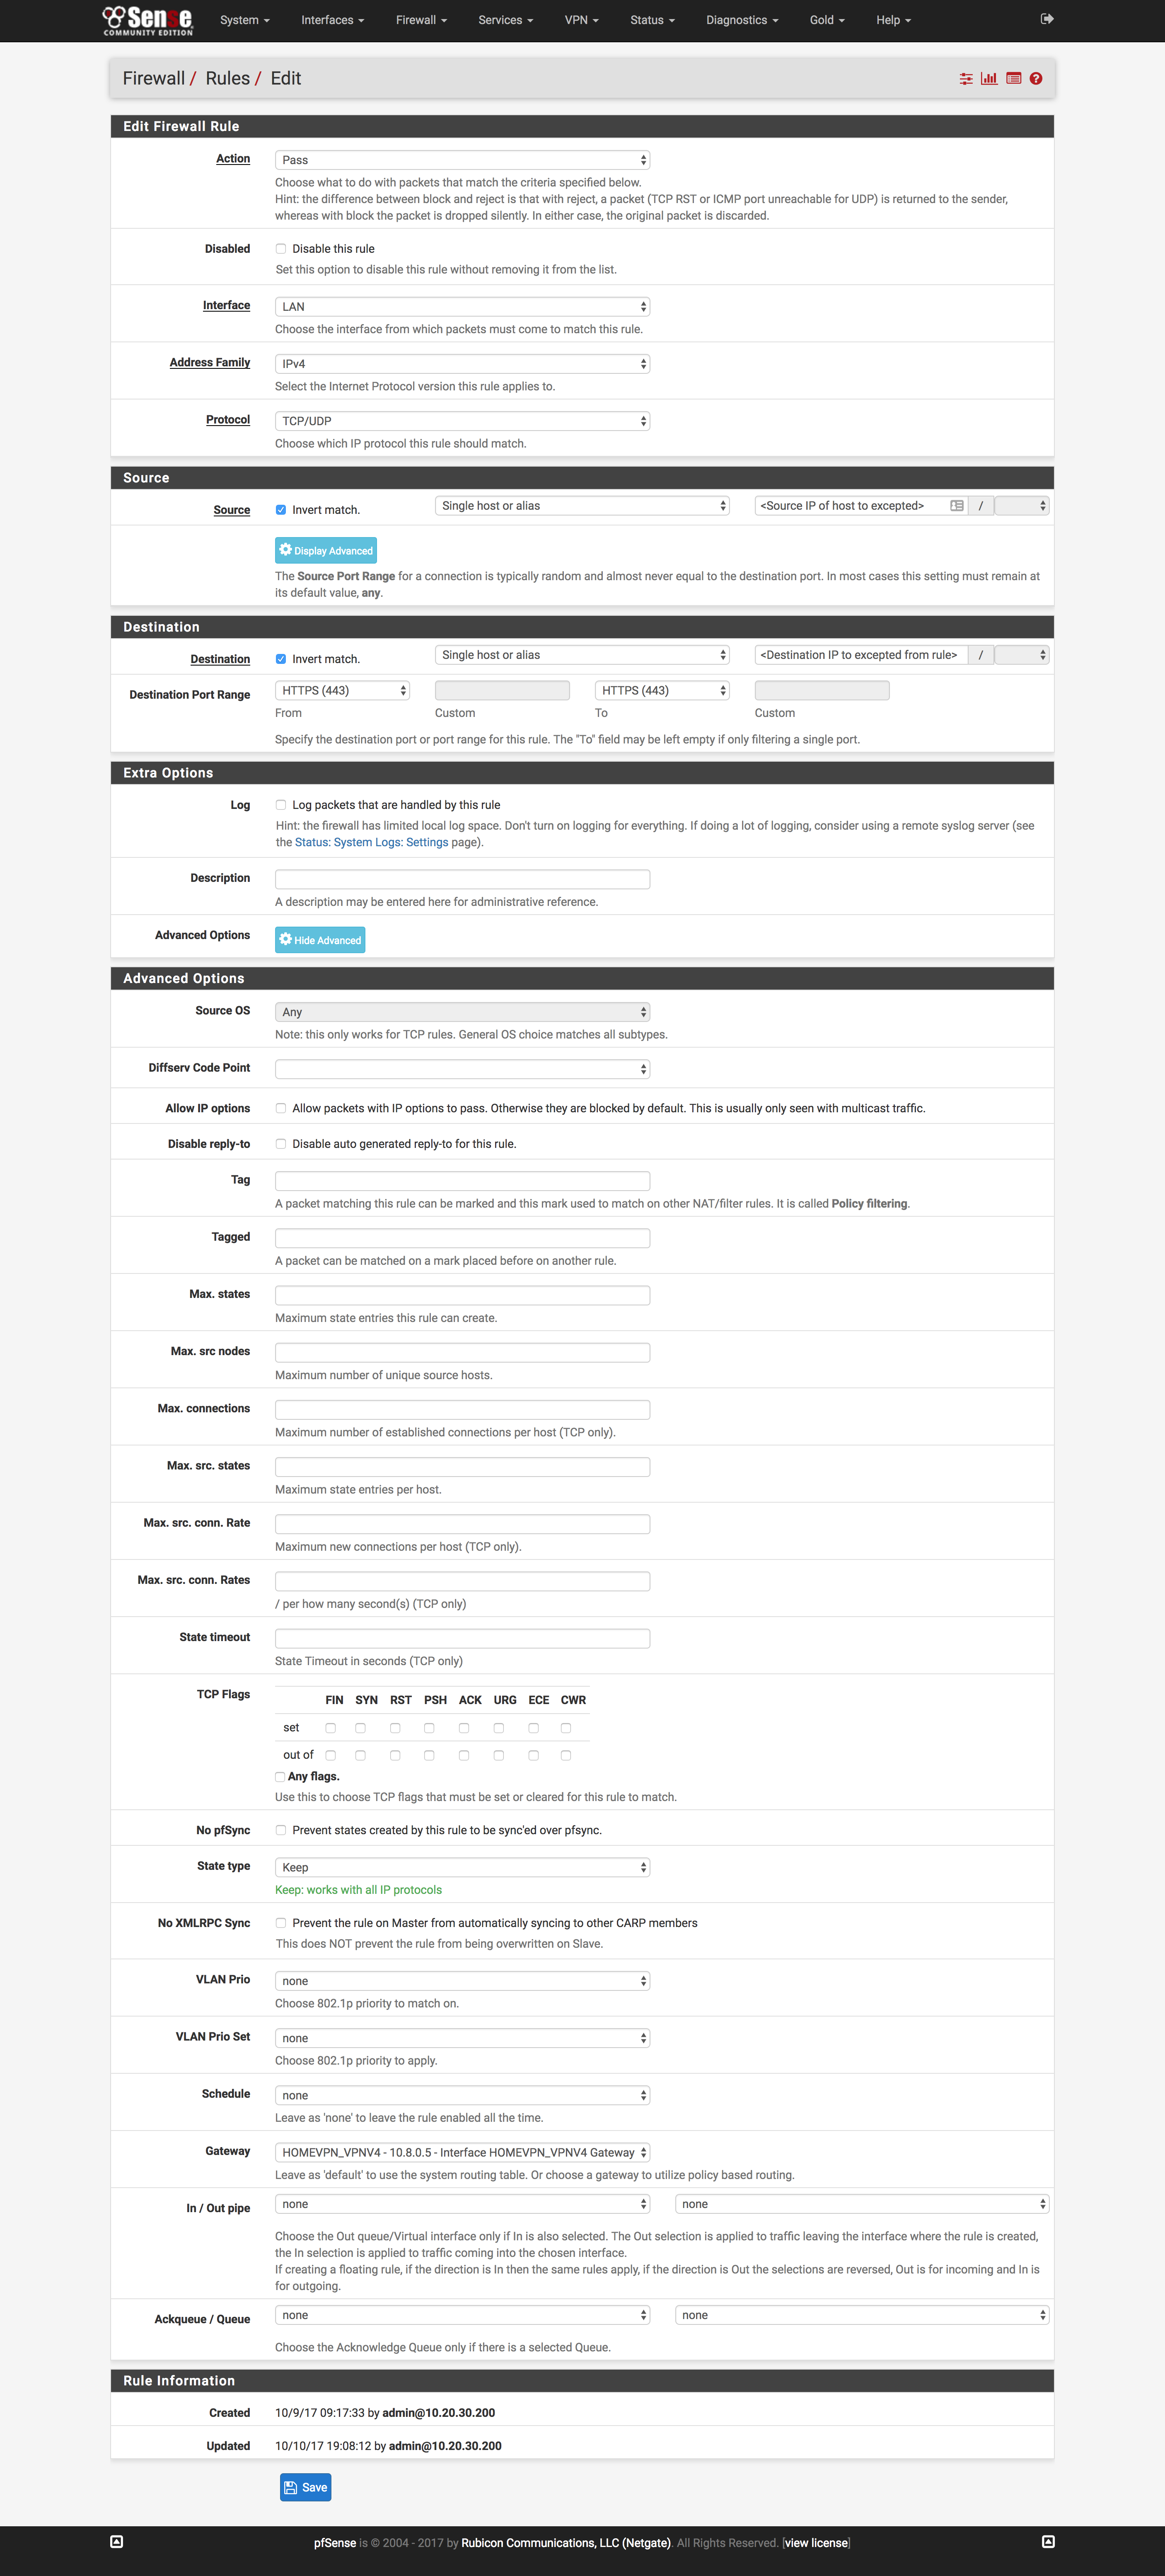
- Repeat Steps 1 through 6, swapping
HTTPfor theDestination Port Range - Reload firewall rules to include the 2 new rules
Verify it works
Google What's my IP and you should get back the IP of your droplet!
Caveats
Unfortunately, Netflix has opted to block the IP ranges of nearly all VPS providers in order to stop users from accessing content that’s unavailable in their country or region. I’ll be adding another post later on how to use pfBlockerNG that will go over how to create automatically updated lists that you can use in firewall rules to bypass using the proxy.
Comments