30 Dec 2017
In a continuation of my previous post on how to use pfSense to get around
certain ISPs’ shoddy interconnects and/or throttling, this post will explain
how to configure the pfSense resource you need to allow hosts on your LAN to
connect to Netflix without being shutdown by their proxy detection and use your
ISP’s gateway for those connections instead.
How it works
We’ll use a pfSense package called pfBlockerNG to compile and maintain lists of
network ranges and save them as firewall aliases. We’ll use the alias to create
firewall rules for those ranges that will bypass our VPN gateway.
Install pfBlockerNG
- Open
Package Manager in pfSense, under the System drop-down menu
- Click the
Available Packages header
- Search for
pfBlockerNG and click the Install button
- Wait for the installation to complete
- Click
pfBlockerNG under the Firewall drop-down menu
- Under the
General tab, check the Enable tickbox
Create the Alias
- Click the
IPv4 tab in the pfBlockerNG settings page, and click Add
- Name the alias “Netflix” or whatever name your heart desires
- Skip
IPv4 Lists for now, we’ll come back to that section in a moment
- Change
List Action to Alias Match
- Change
Update Frequency to whatever rate you’d like
- Create the lists! For my ISP, I needed to add three lists, configured as:
Netflix
- Format: Whois
- State: On
- Source: AS2906
- Header/Label: Netflix
Centurylink
- Format: Whois
- State: On
- Source: AS209
- Header/Label: Centurylink
AWS
- Format: Regex
- State: On
- Source: https://ip-ranges.amazonaws.com/ip-ranges.json
- Header/Label: AWS
Explanation: We need to use those three IP ranges (For Centurylink, at
least) since Netflix hosts a substantial portion of their infrastructure on
Amazon Web Services, and pays CL to host local proxies of their content on
their private network. If you're using a different ISP, you might need to add
your own ISP's BGP Autonomous System number, depending on whether or not they
proxy Netflix content the same way CL does.
Create firewall rule
- Click
Rules under the Firewall dropdown at the top of the page
- Click the
LAN tab and click the Add button with the upward-facing arrow
- Change
Protocol to TCP/UDP
- Change
Protocol to Any
- Configure
Source in whichever way you’d prefer. I have mine set to Single
host/alias and the IP of my smart TV. Amazon Web Services hosts a huge number
of companies services, I’d prefer to only bypass the proxy just for my TV.
- Change
Destination to Single host/alias and select the pfB_Netflix
alias we created
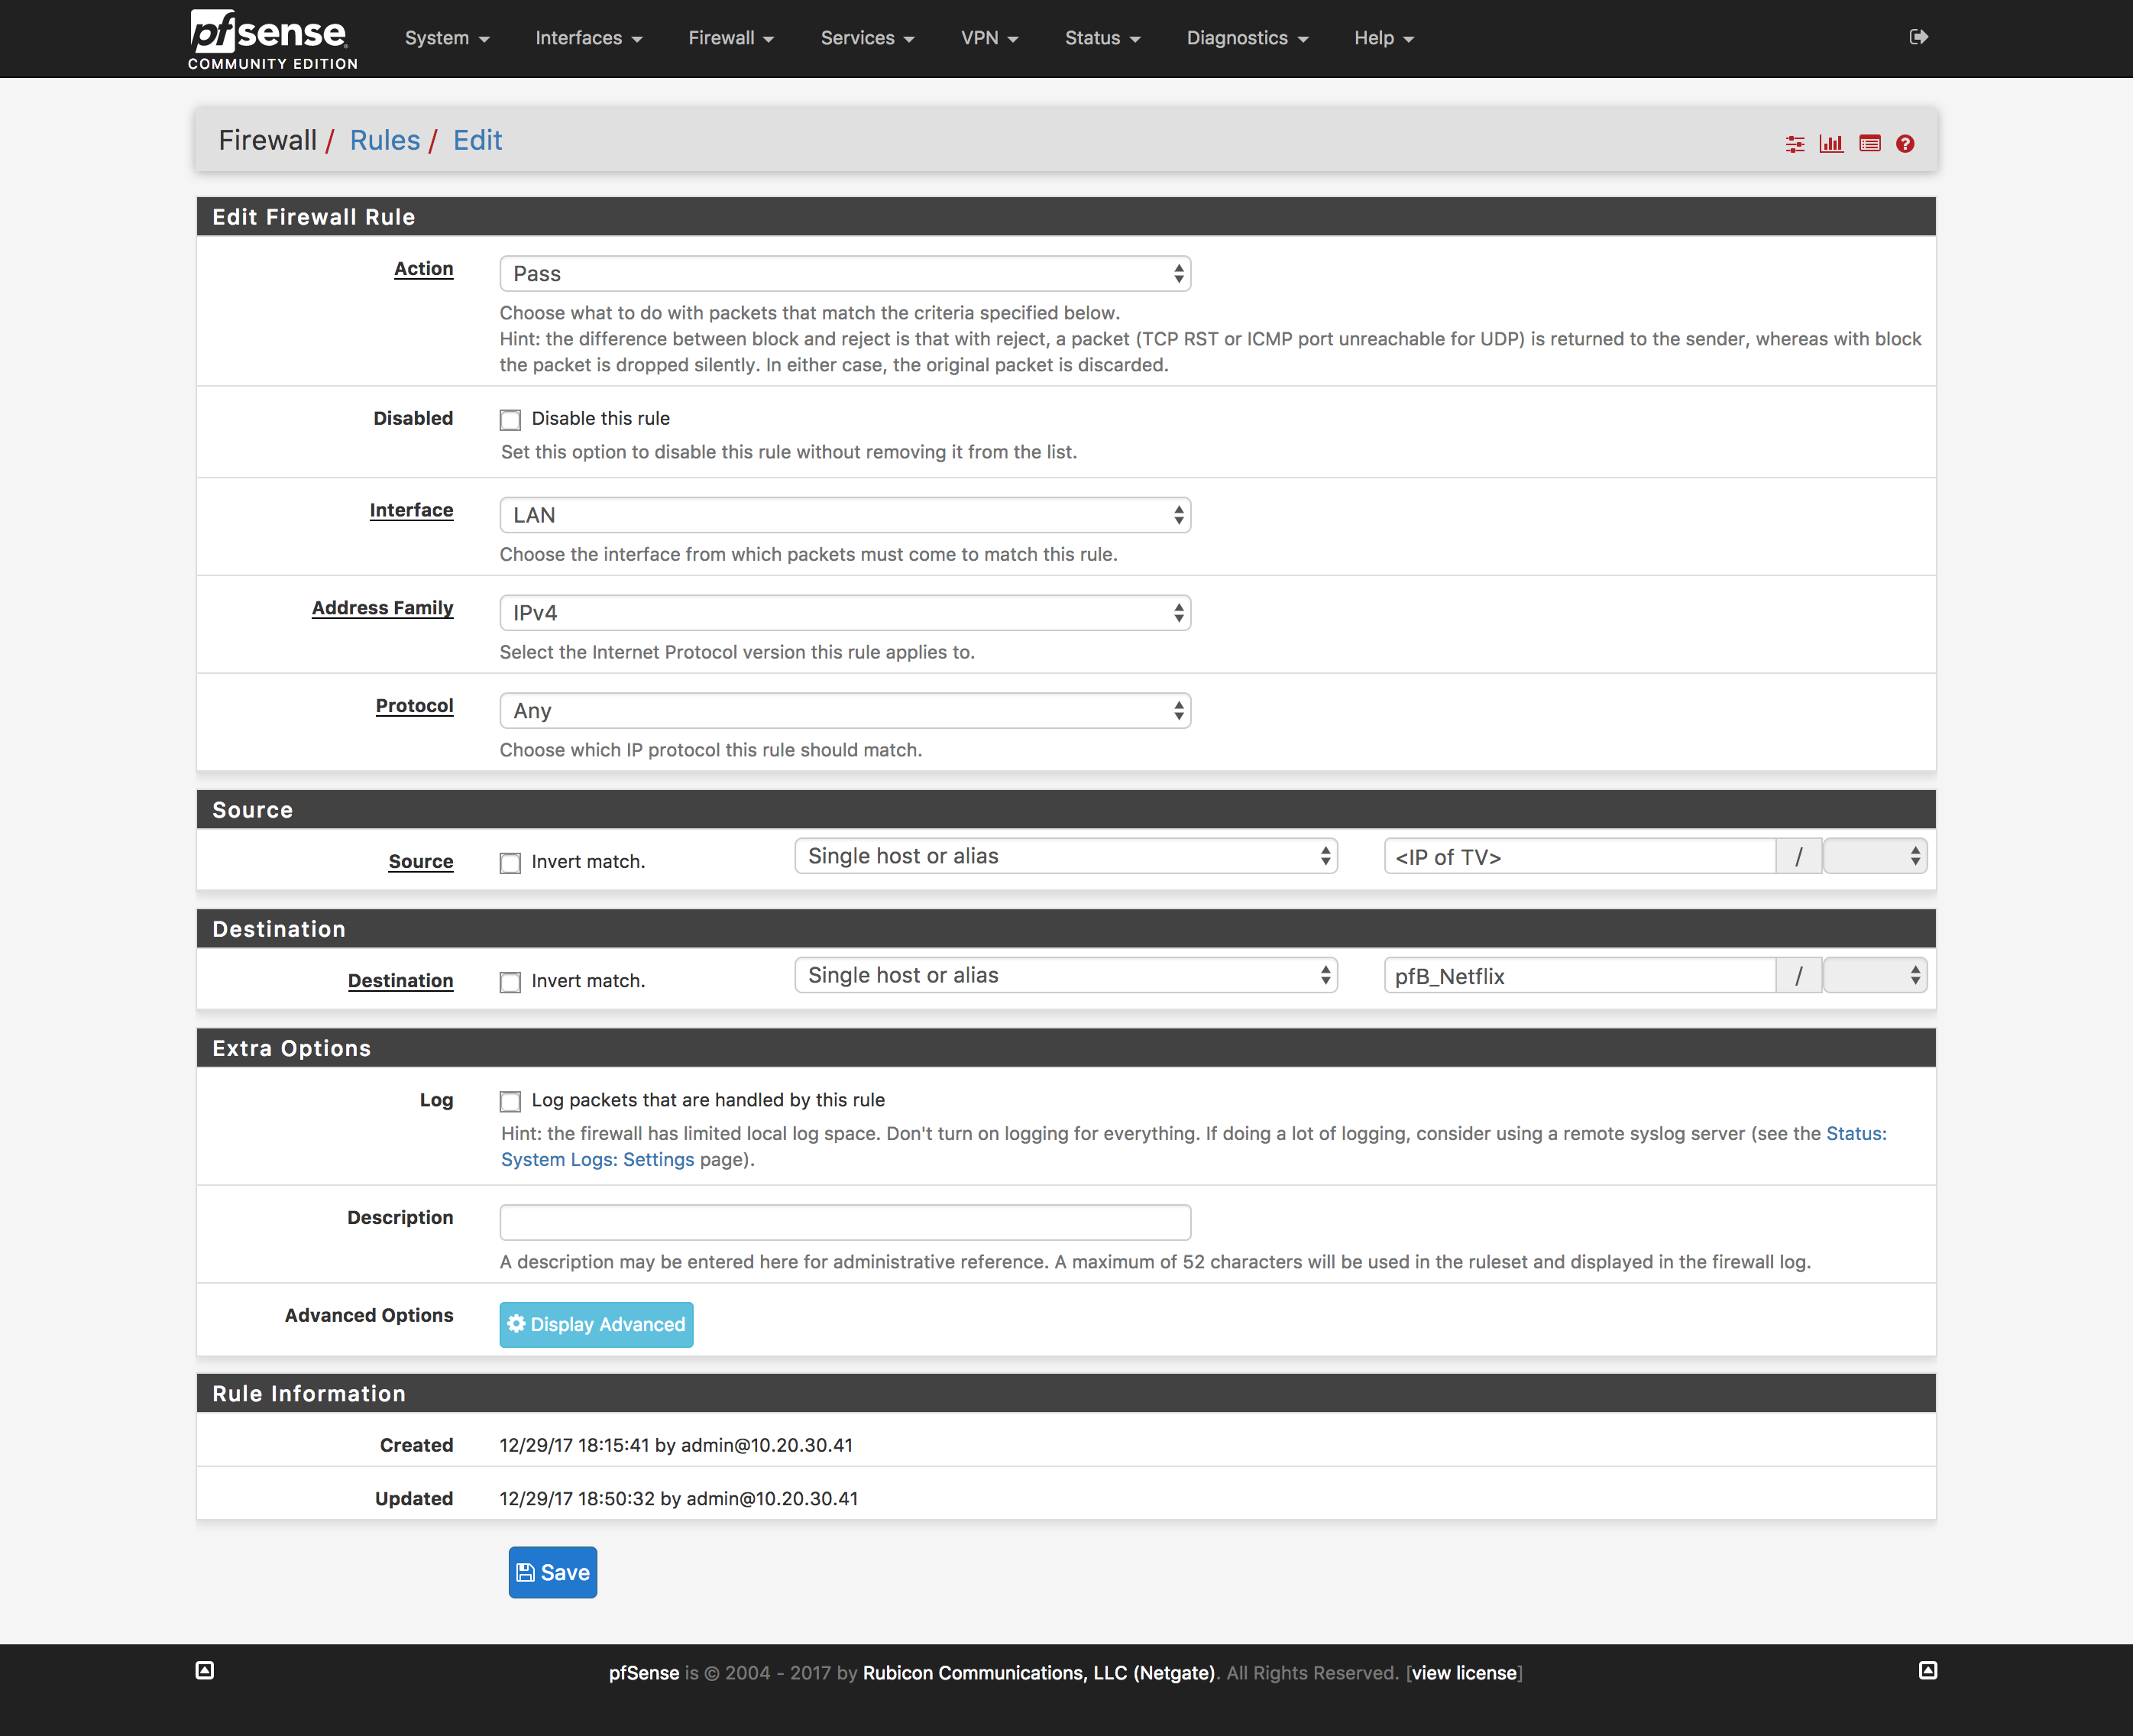
- Reload firewall rules to include the newly created rule
Verify it works
Test! You should be able to connect to Netflix with no angry “PROXY DETECTED!”
errors.
22 Oct 2017
Sometimes you end up moving to a place where the only ISP options available are
complete and total trash cough-CenturyLink-cough, so here’s the workaround
that proxies only the likely-to-be-throttled traffic while leaving all other
traffic untouched (eg, ping times for games stay low, any external services you
have NAT’d will still work correctly).
This project uses:
Set up the droplet
DigitalOcean has a very thorough guide on setting up
OpenVPN,
it should be plenty to get you started.
Set up pfSense
You’ll need to configure pfSense’s OpenVPN client to connect and route traffic
over the OpenVPN droplet
Add the certificates
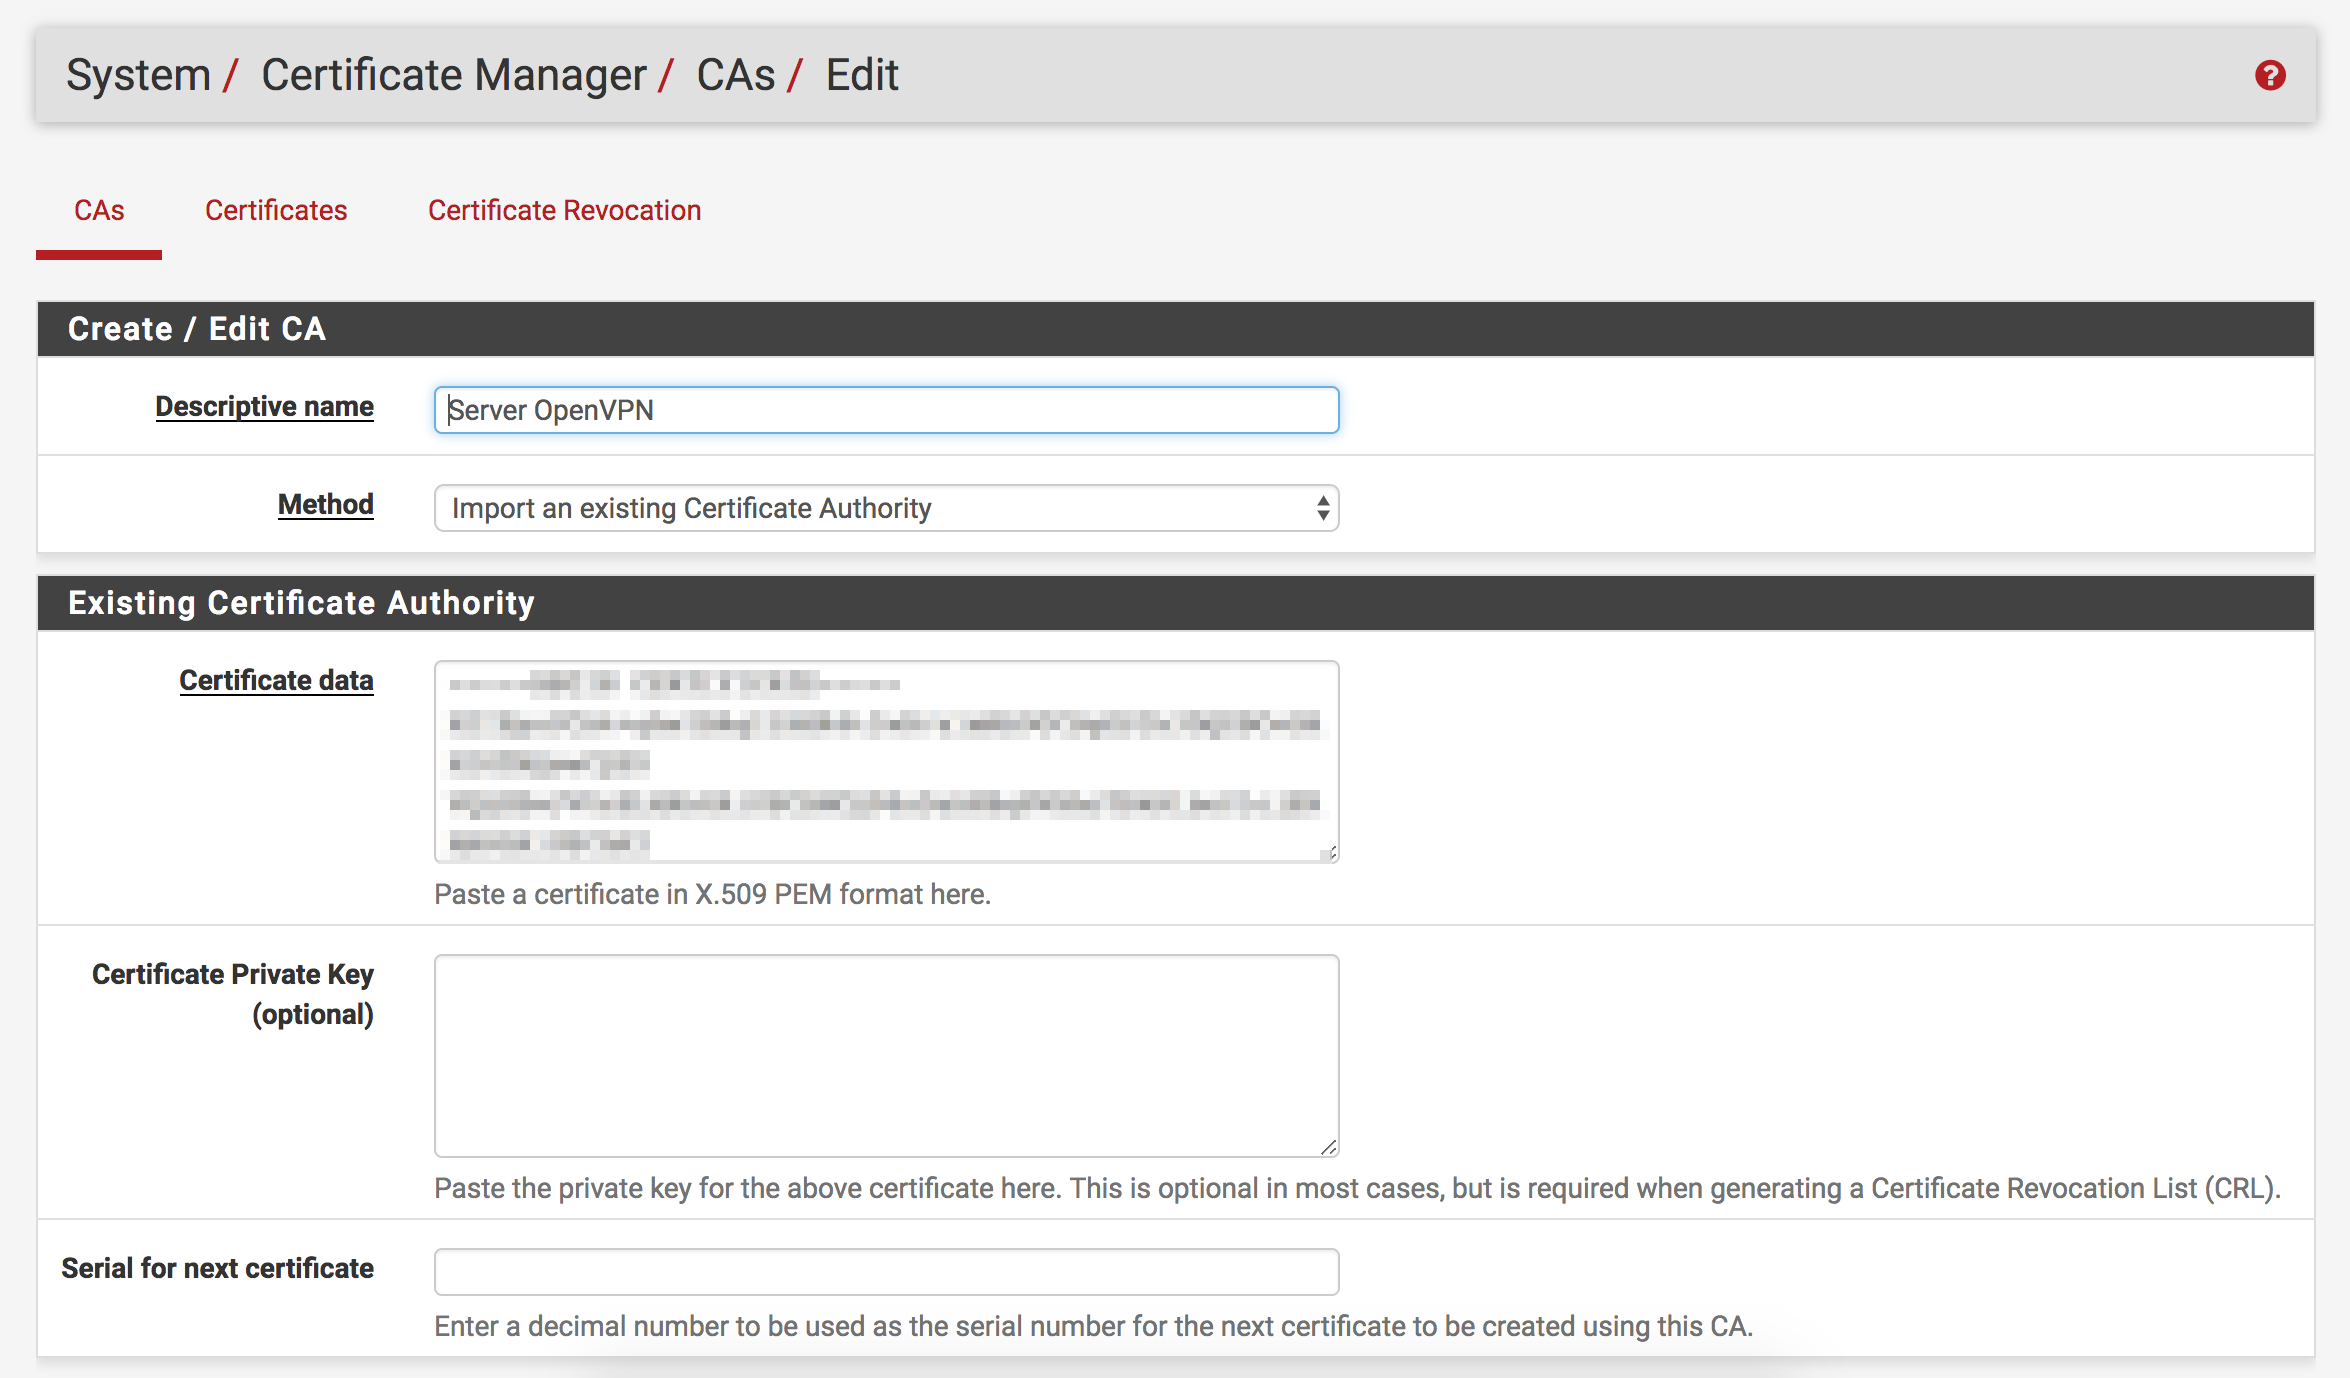
- Open pfSense’s
Cert. Manager page under the System drop-down
- Create the CA
- Click the
Add button
- Name the CA “OpenVPN” (or whatever you want to call it, I’m not here to tell
you how to live your life)
- Set
Method to “Import an existing Certificate Authority” (It should default
to this)
- Copy the content of the
ca.crt you created from DigitalOcean’s guide
Certificate Private Key and Serial for next certificate should both be
left blank
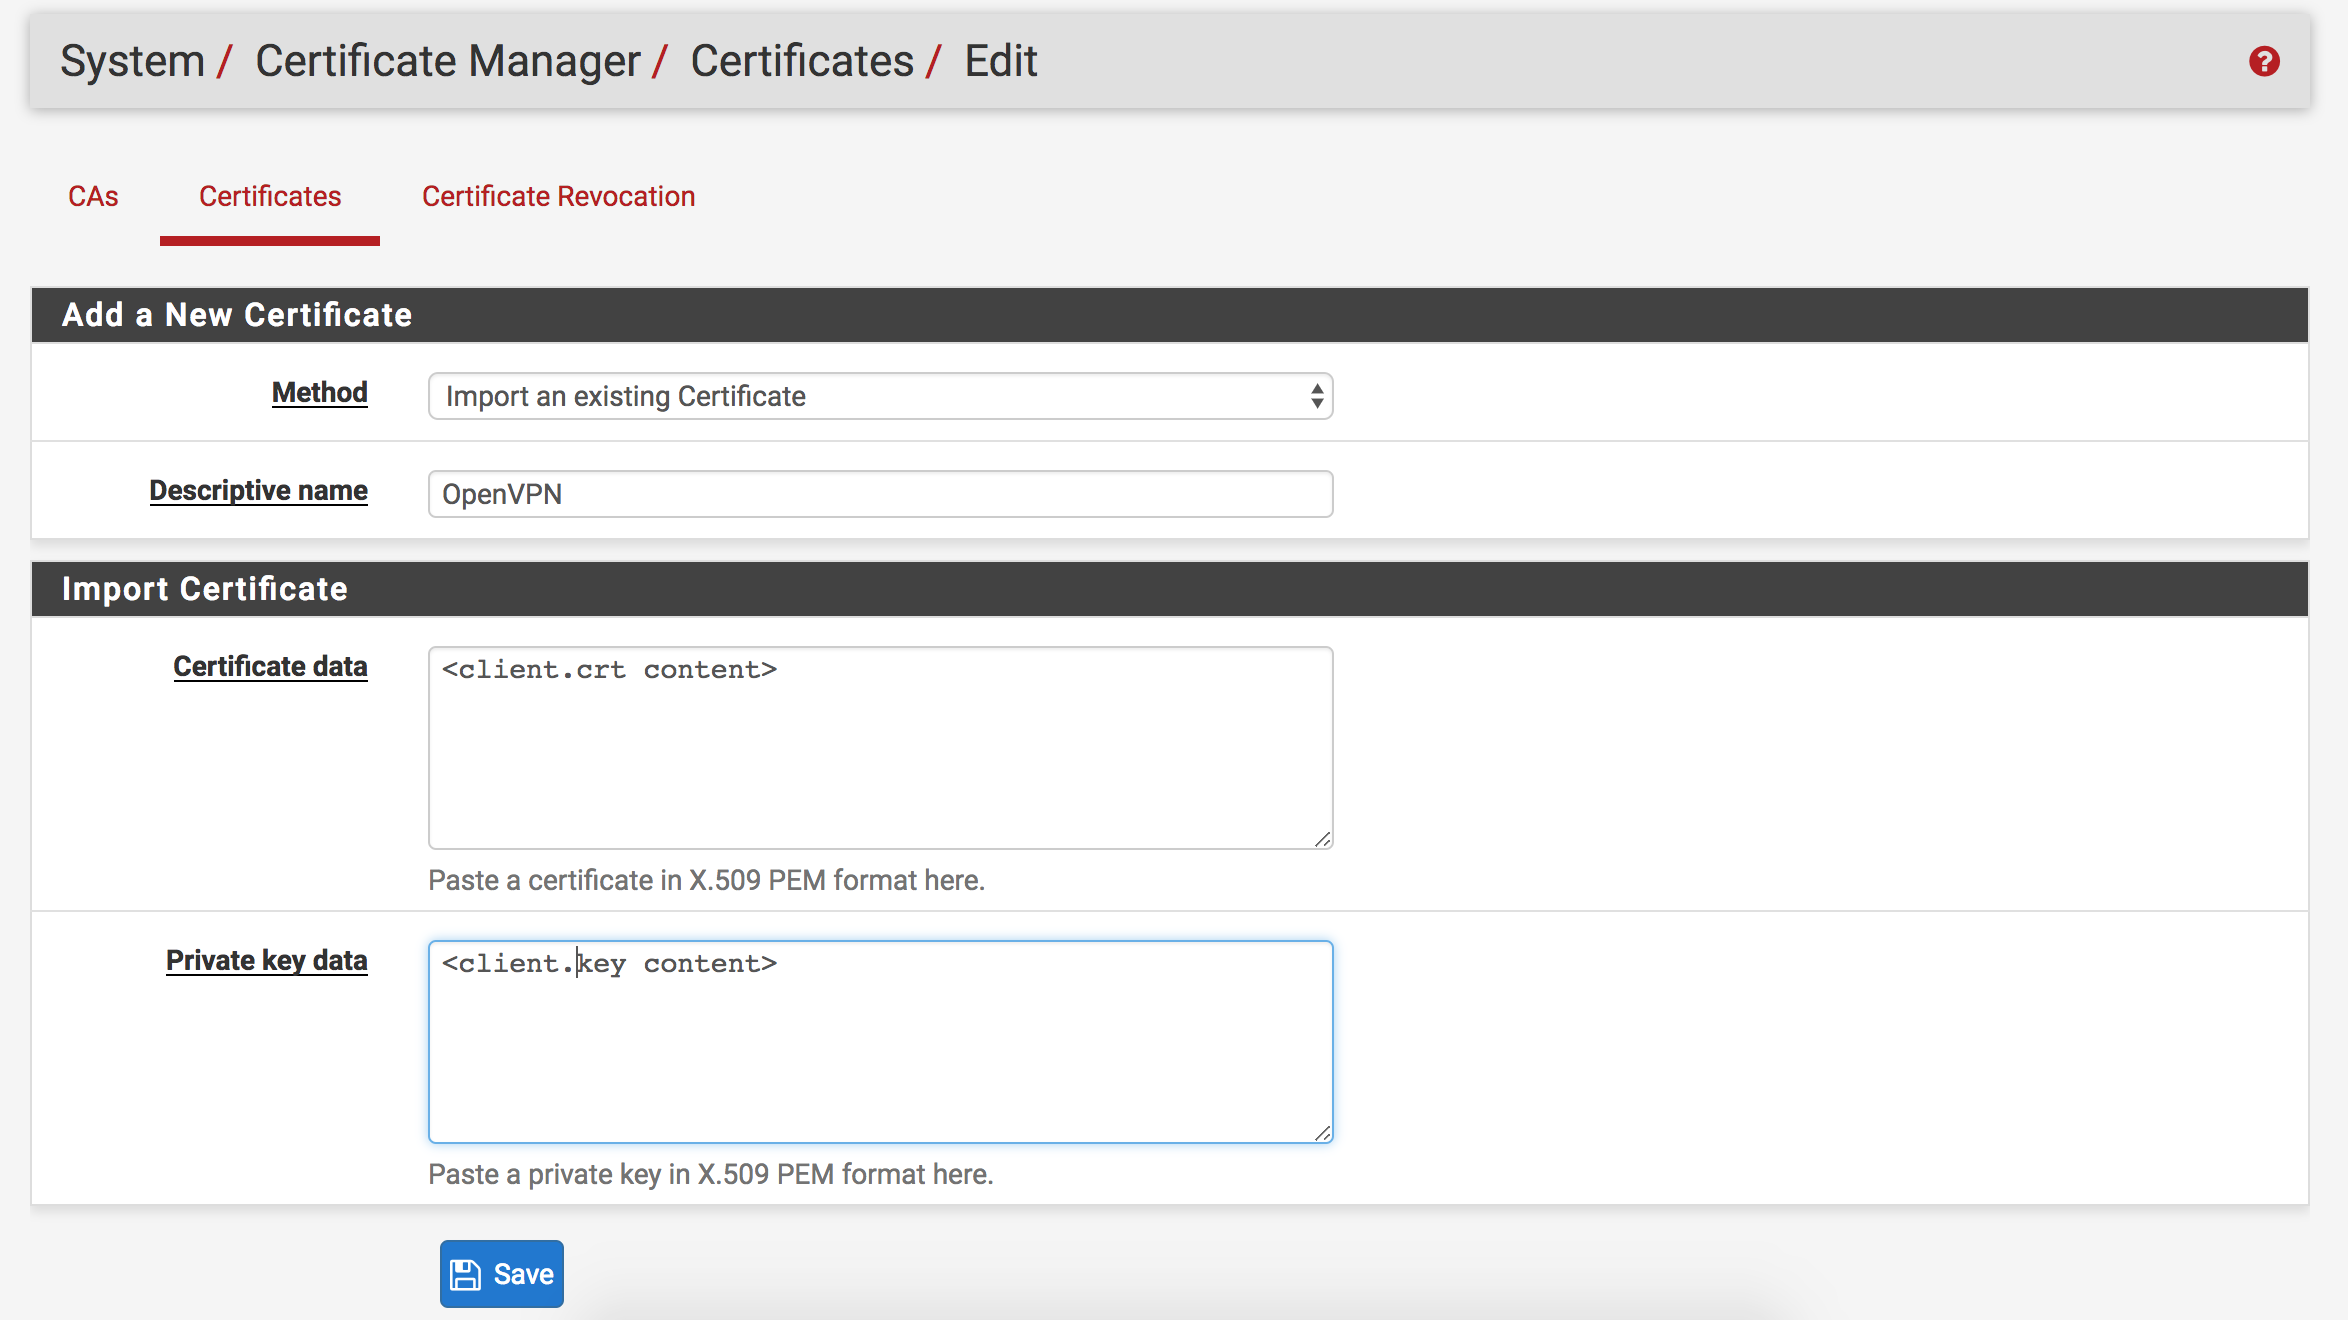
- Add the OpenVPN client certificate and key
- Click the
Certificates header button at the top of the page after importing
the CA
- Click the
Add button
- Leave
Method as “Import an existing Certificate”
- Name the certificate “OpenVPN” (Or don’t; it’s your party, you do what you
want to)
- Paste the content of
client.crt created in DigitalOcean docs into
Certificate data
- Paste the content of
client.key created in DigitalOcean docs in Private
key data
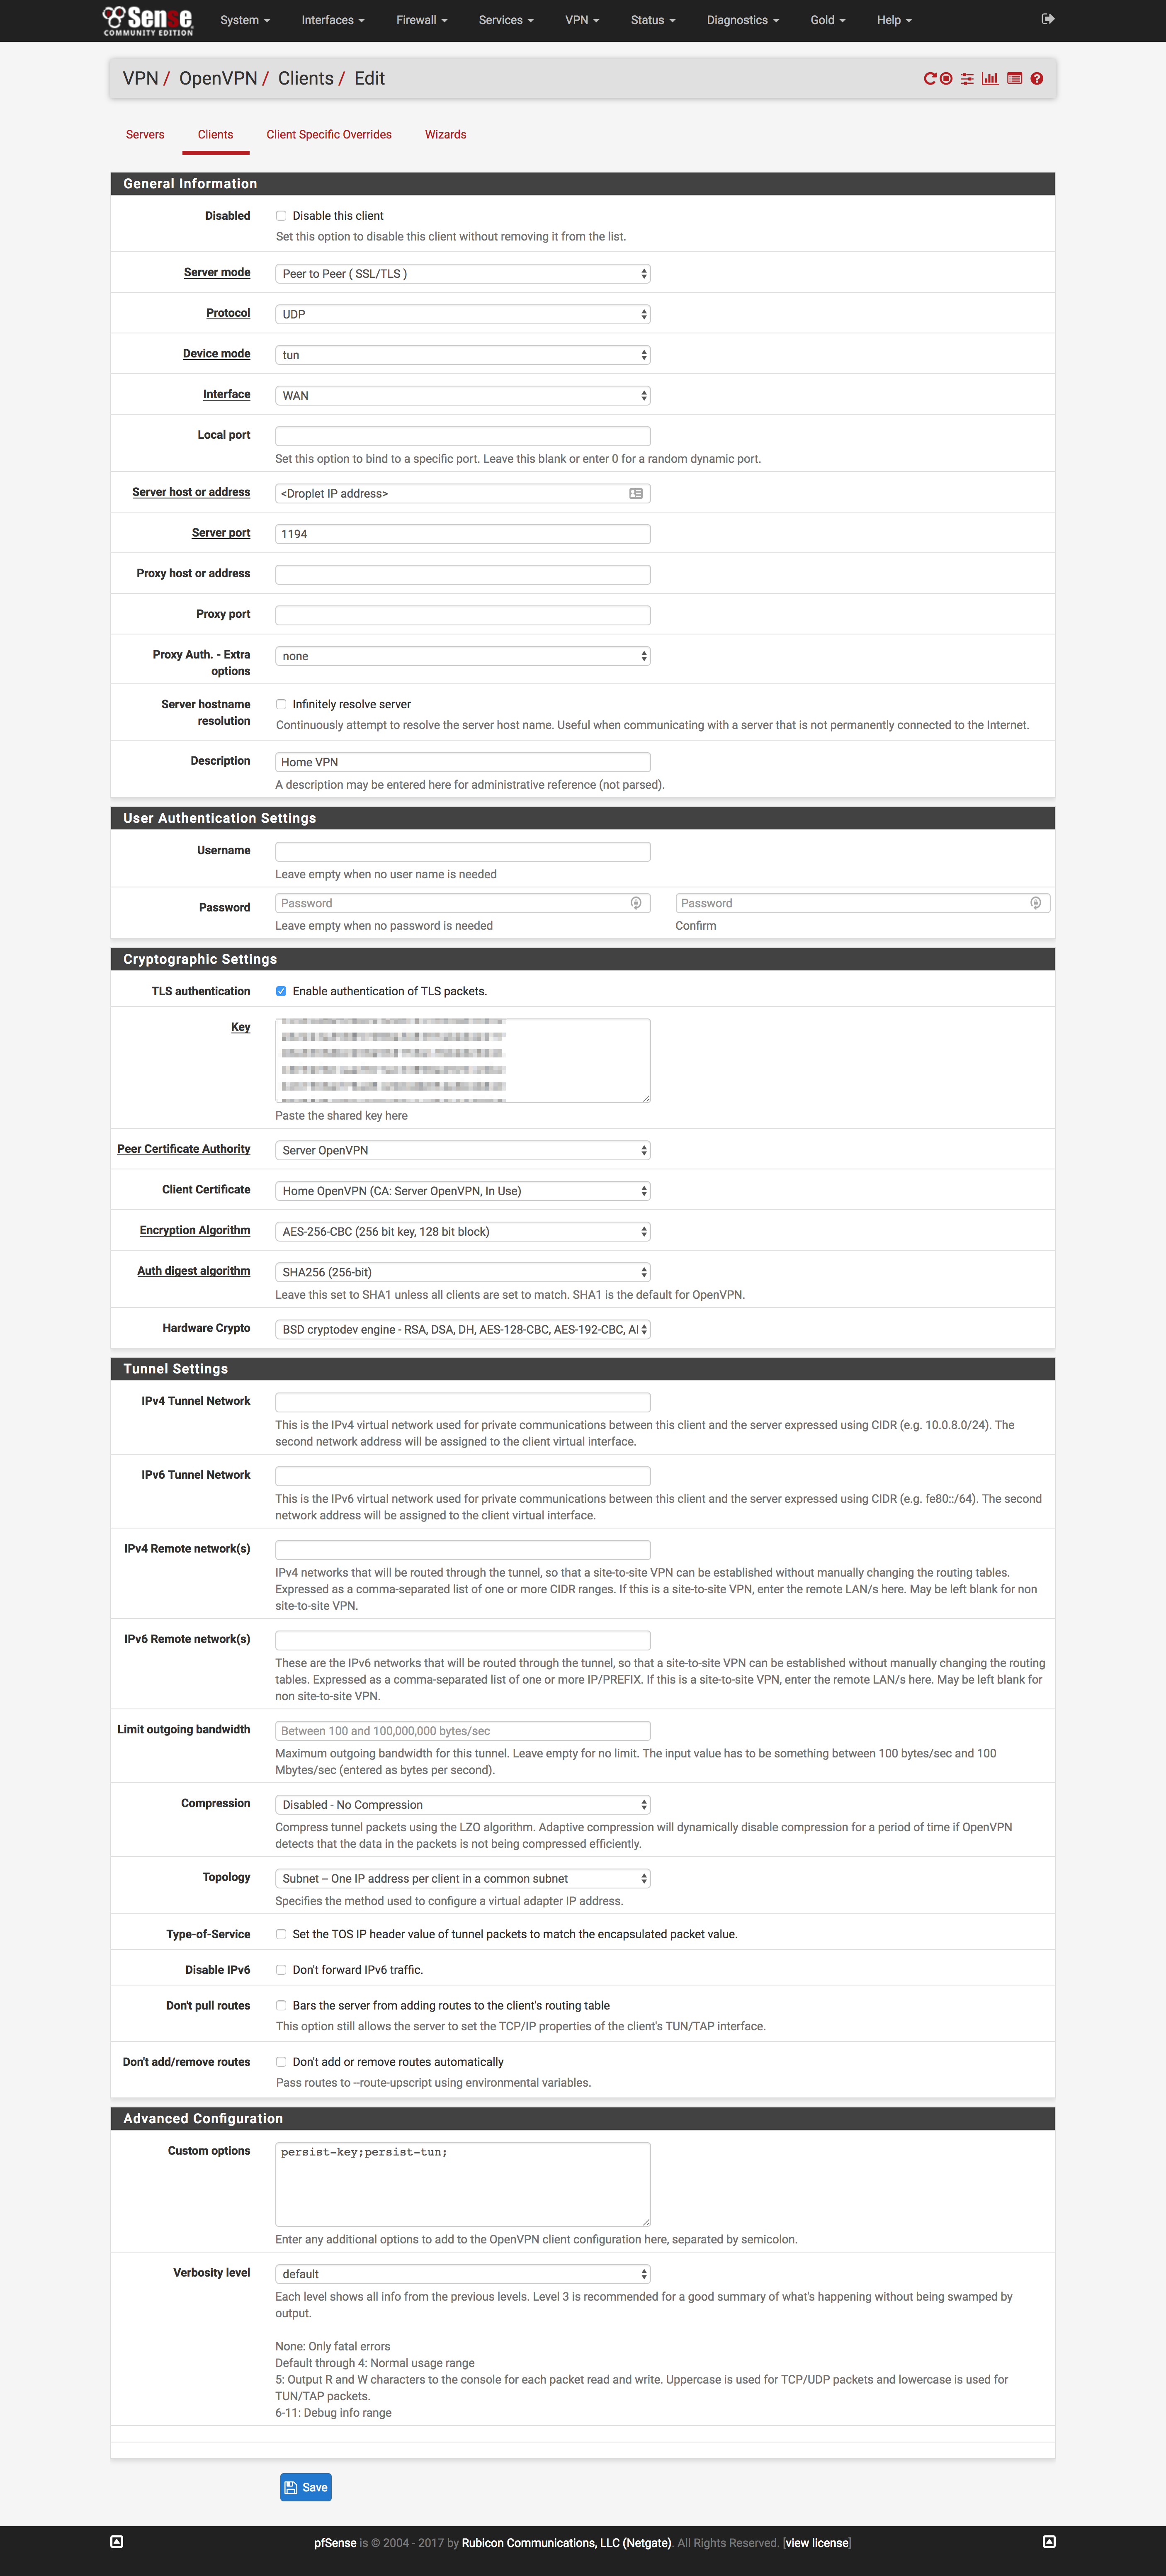
Set up OpenVPN client
- Click
OpenVPN under the VPN dropdown at the top of the page
- Click the
Clients tab and click Add
- Most settings can be left at defaults
- Put the IP of your Droplet in
Server host or address
- Paste the content of
ta.key in Key field after checking TLS
authentication
- Change the
Peer Certificate Authority and Client Certificate to the CA
and cert created earlier.
- Change
Auth digest algorithm to “SHA256”
- Under
Custom options, paste persist-key;persist-tun;
Start OpenVPN
- Click
OpenVPN underneath the Status button at the top of the page
- Click the
Start button at the right of the page for the client created
above
Create the OpenVPN interface
- Click
(assign) underneath the Interfaces dropdown at the top of the page
- Change the dropdown near the bottom of the page to the OpenVPN client
created above and click
Add
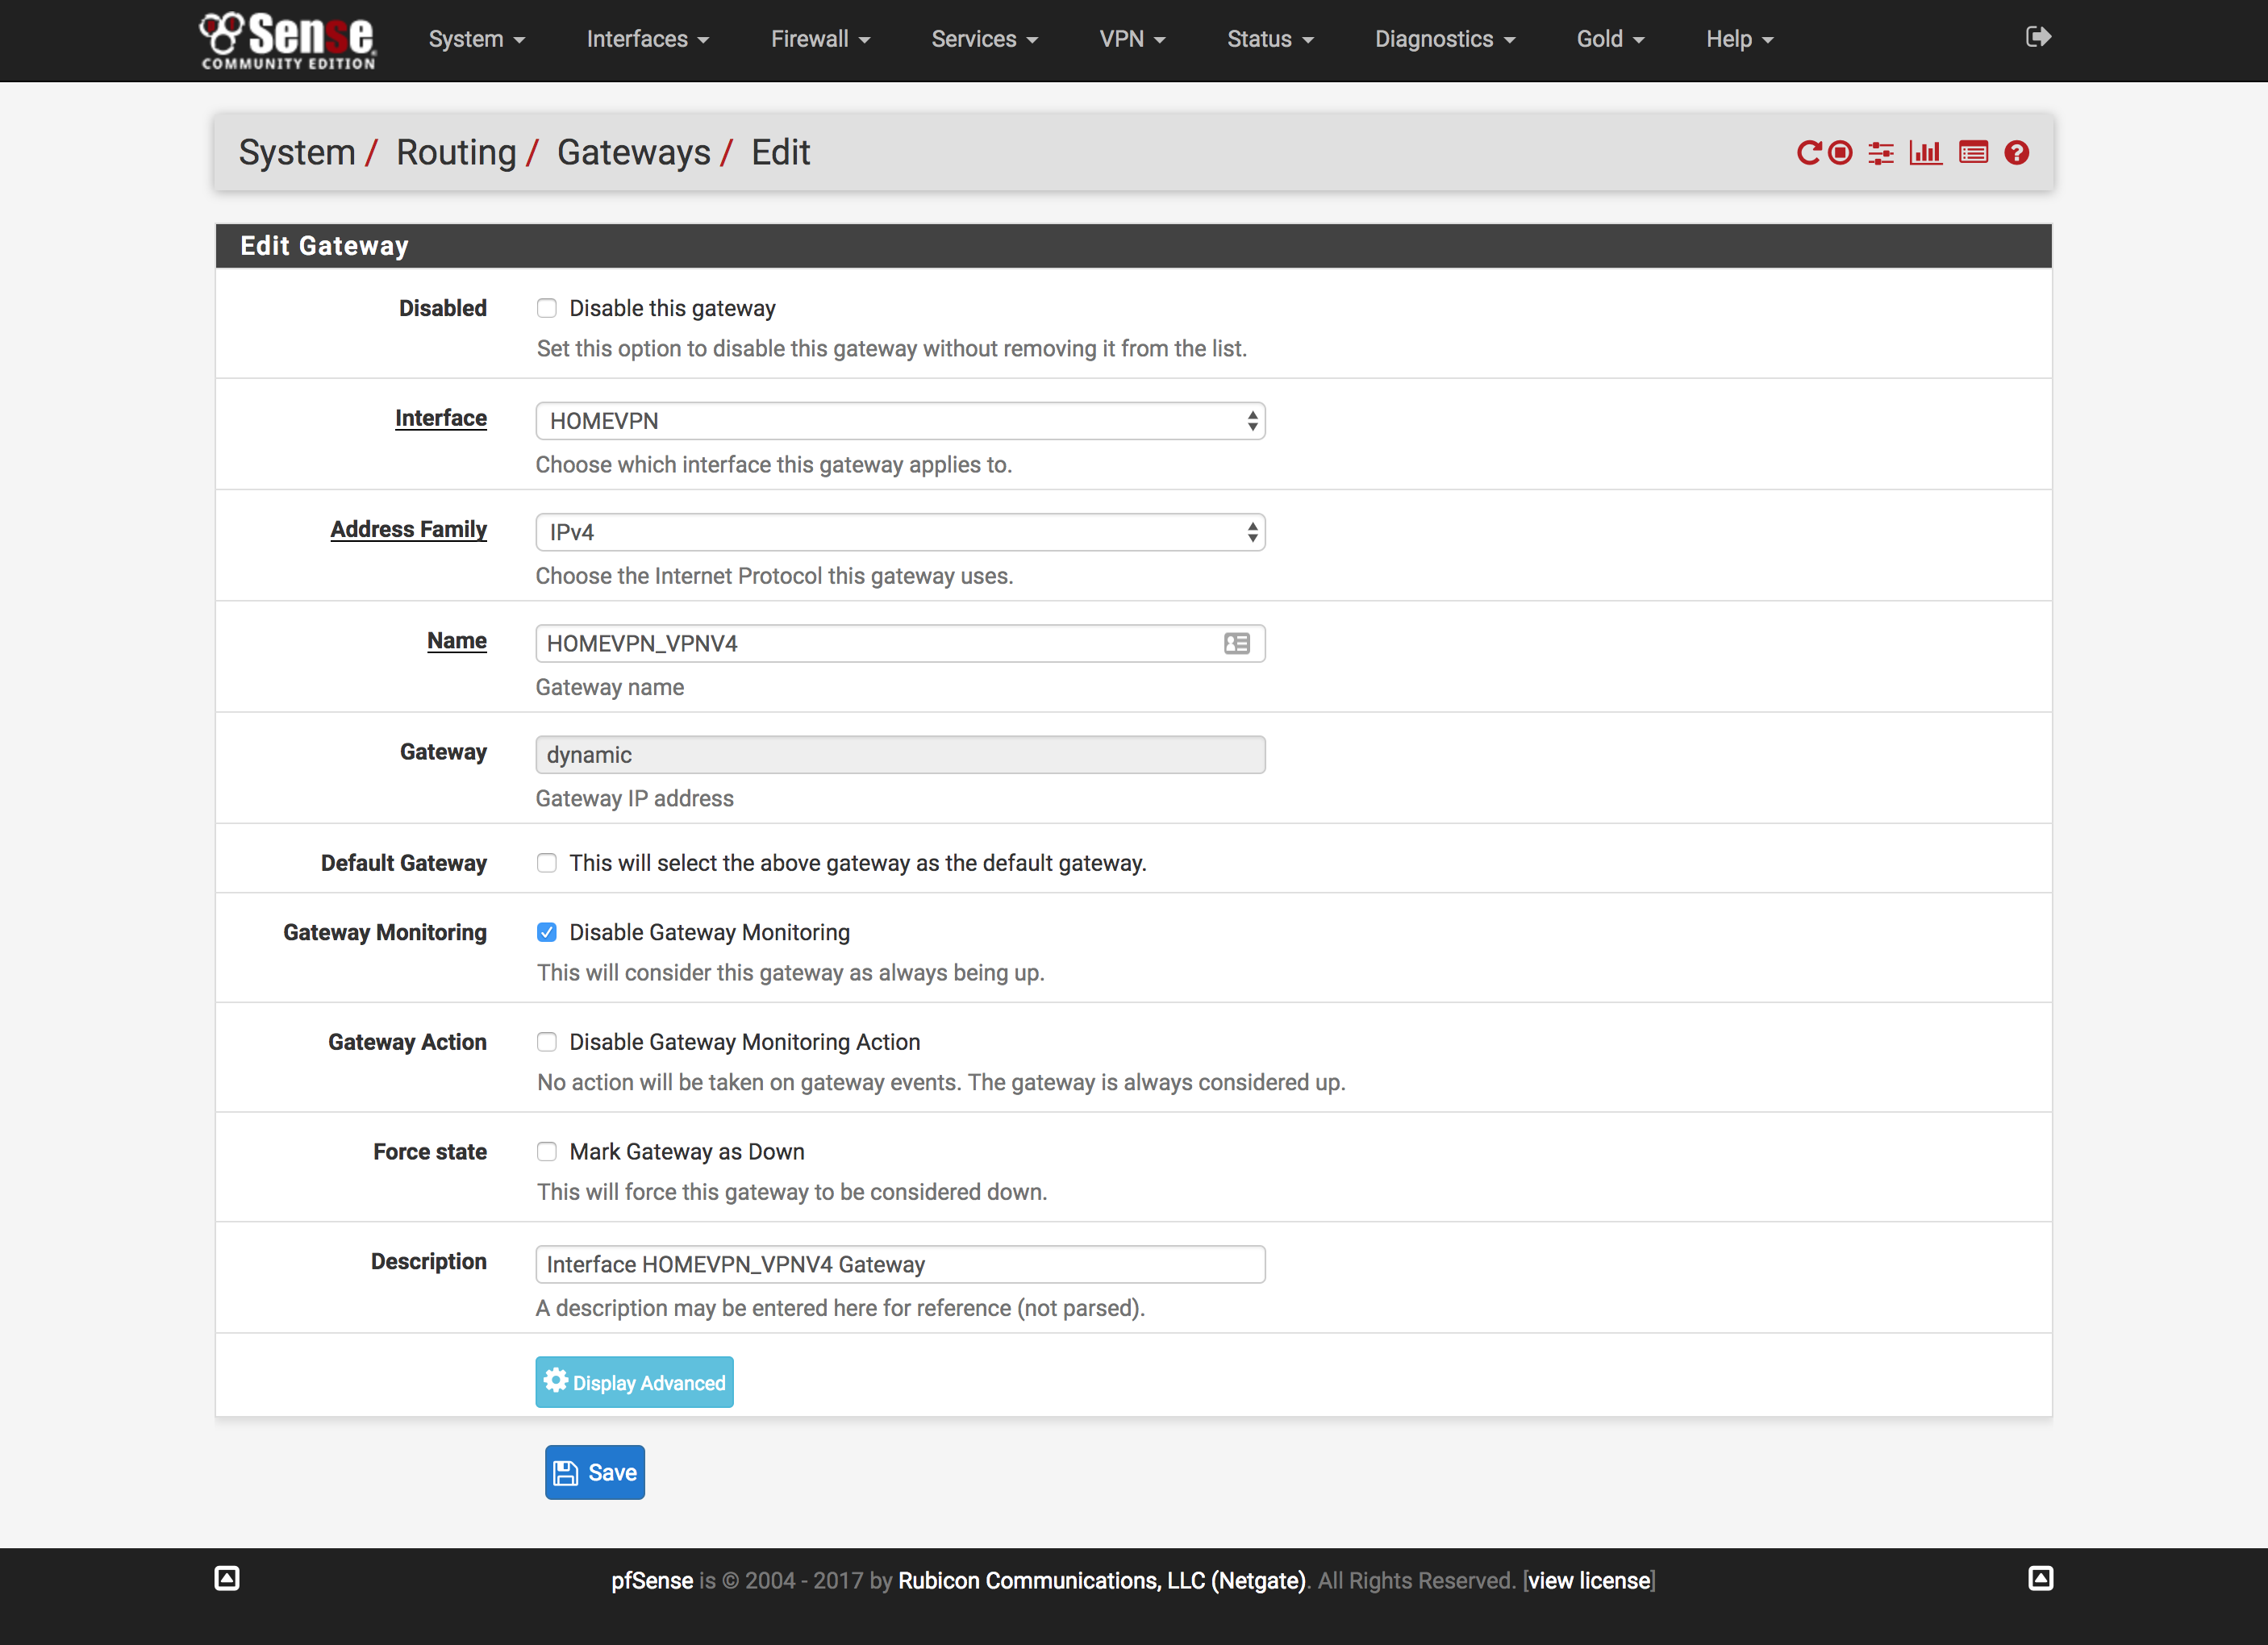
- Click
Routing under the System dropdown at the top of the page
- Click
Add to create a new Gateway
- Change
Interface to the interface created above
- Check
Disable Gateway Monitoring
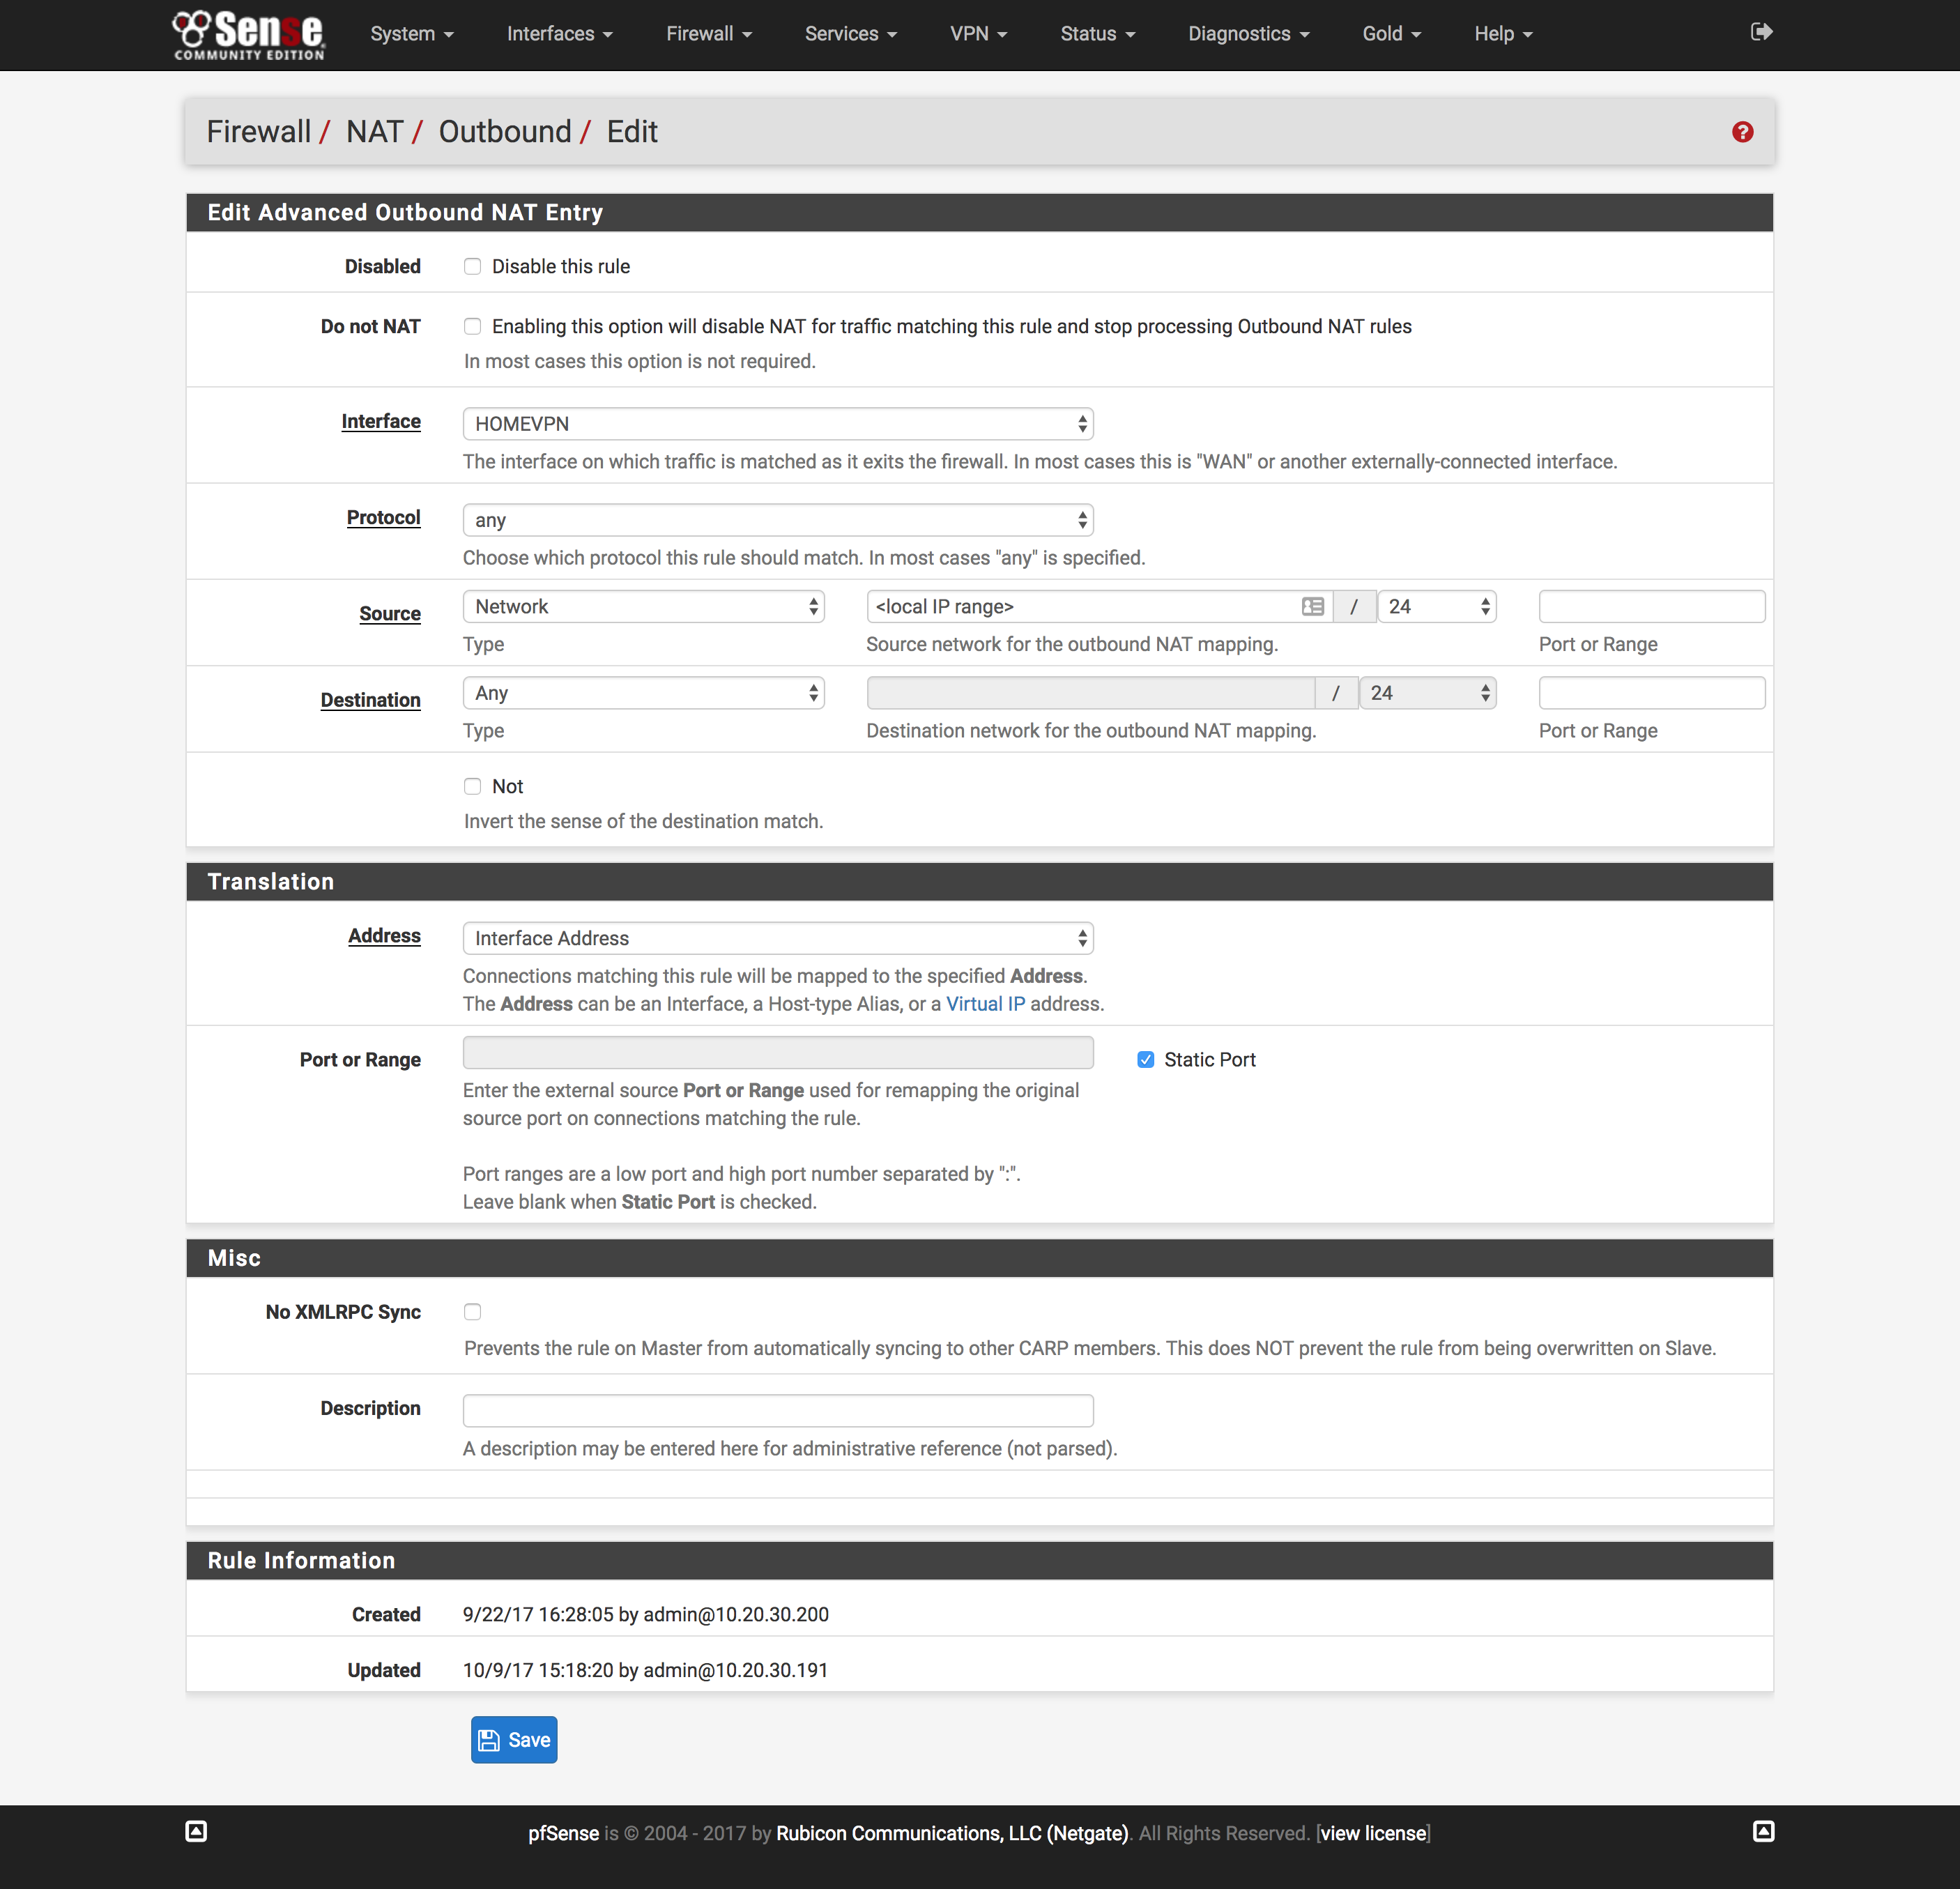
NAT needs to configured on the VPN gateway so pfSense won't try to route
directly to OpenVPN
- Click
NAT under the Firewall dropdown at the top of the page
- Click the
Outbound tab and click Add
- Change interface to the interface created above
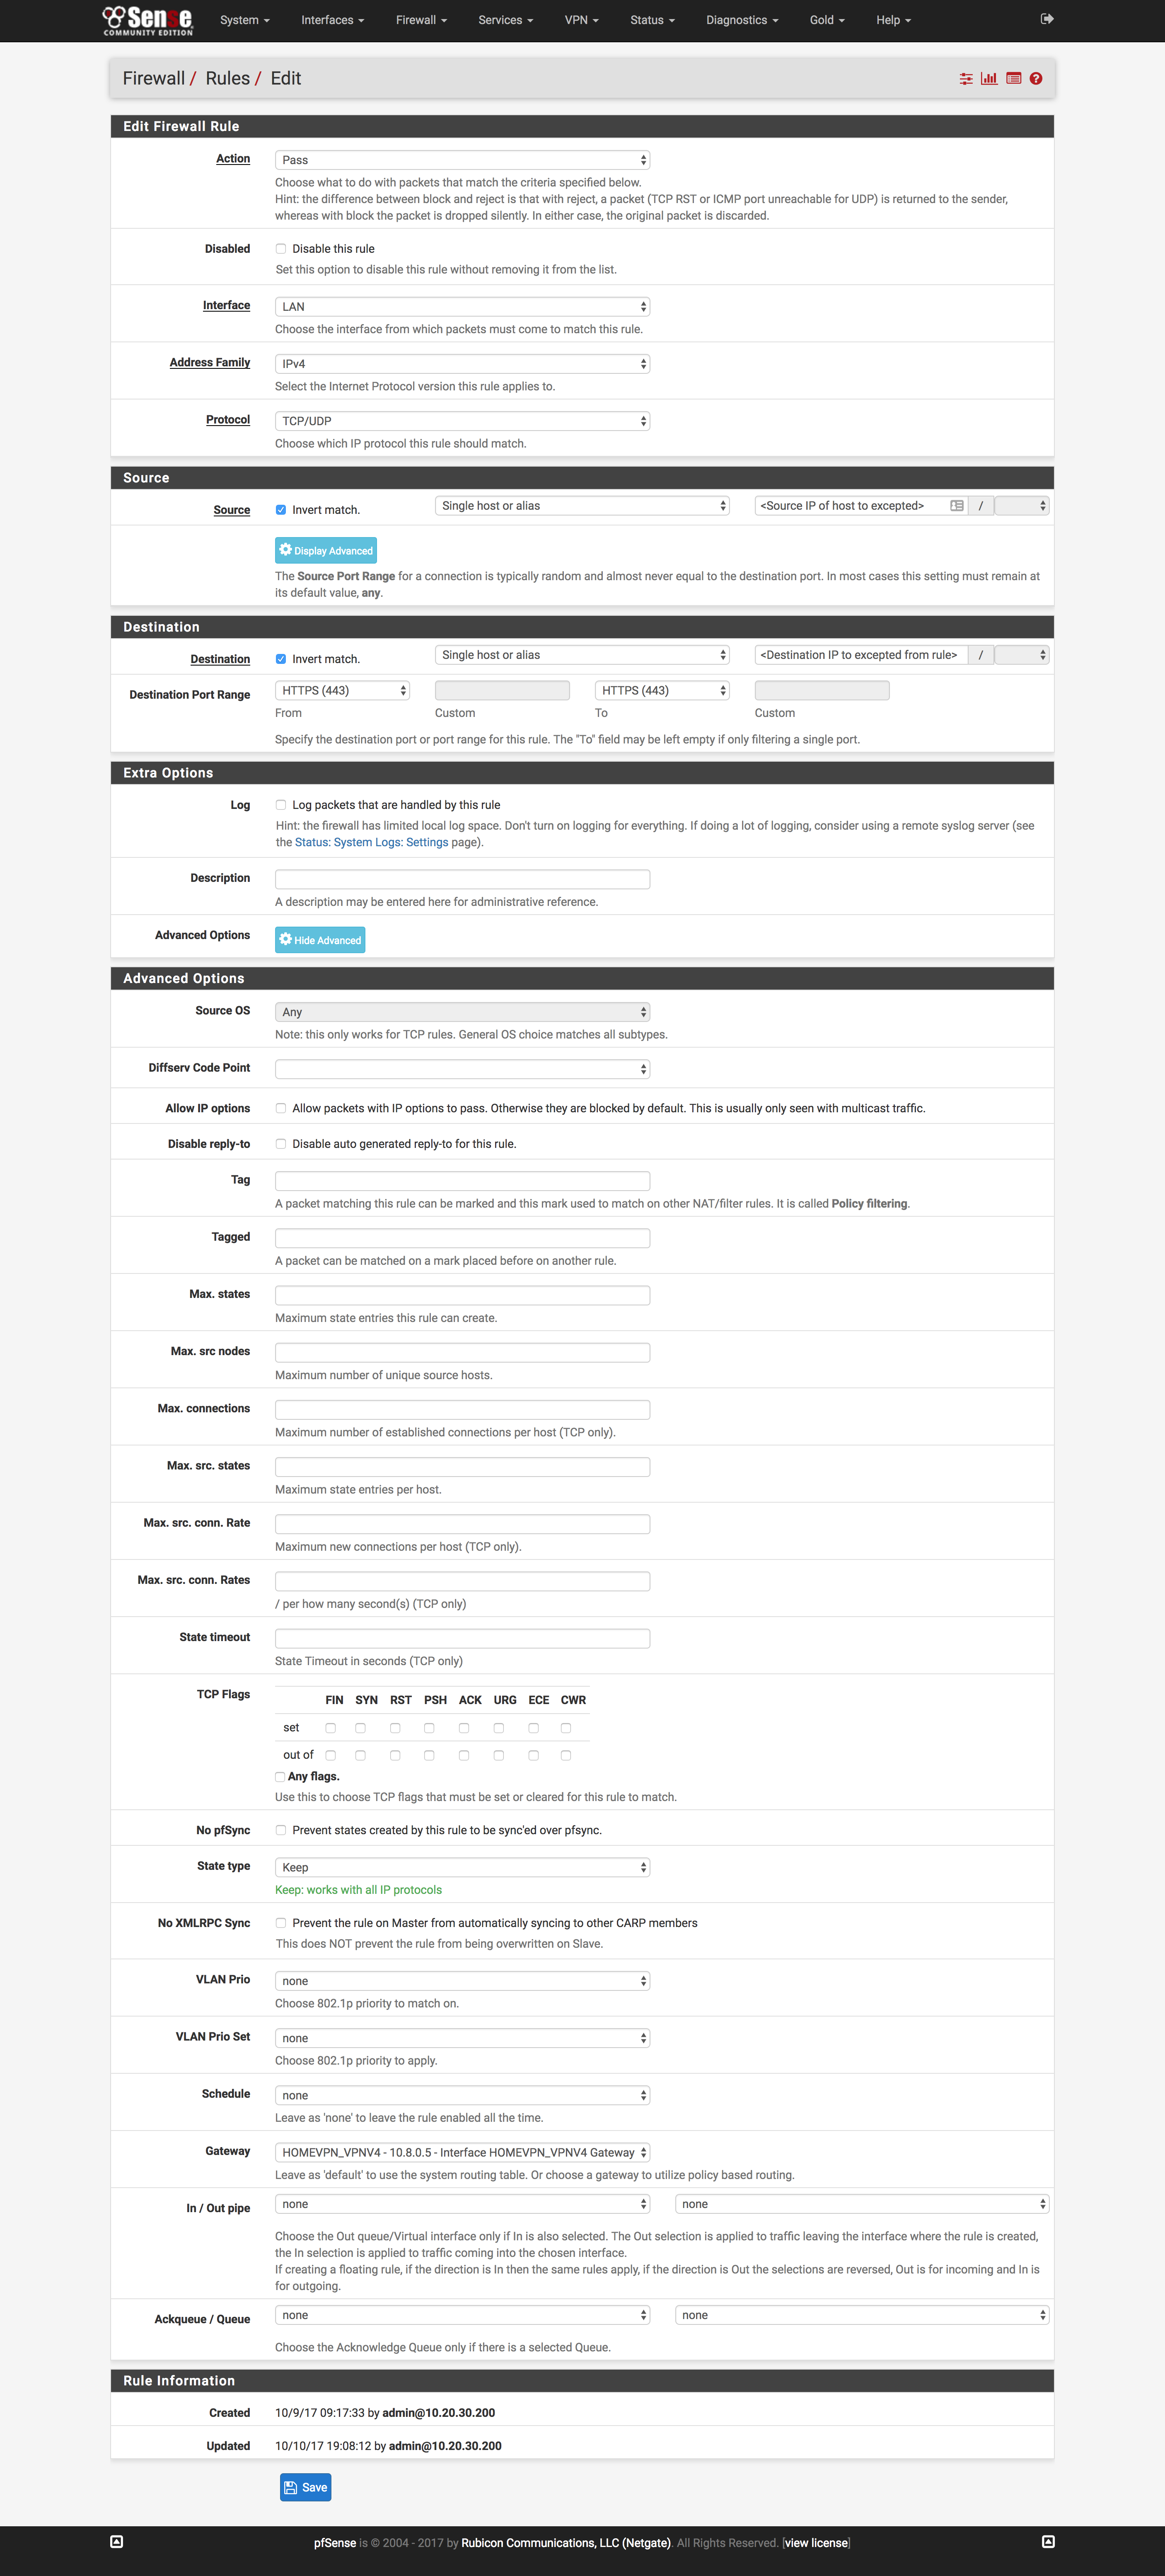
Create firewall rules
- Click
Rules under the Firewall dropdown at the top of the page
- Click the
LAN tab and click the Add button with the upward-facing arrow
- Change
Protocol to TCP/UDP
- Change
Destination Port Range to HTTPS
- Click
Display Advanced under Advanced Options
- Change
Gateway to the gateway created above and click Save
- Repeat Steps 1 through 6, swapping
HTTP for the Destination Port Range
- Reload firewall rules to include the 2 new rules
Verify it works
Google What's my IP and you should get back the IP of your droplet!
Caveats
Unfortunately, Netflix has opted to block the IP ranges of nearly all VPS
providers in order to stop users from accessing content that’s unavailable in
their country or region. I’ll be adding another post later on how to use
pfBlockerNG that will go over how to create automatically updated lists that
you can use in firewall rules to bypass using the proxy.